For Annotation Plan see my other Annotation page.
Table of Contents
- Recipe
- Tools and Materials
- Session #1 Lengthening. - Proof of concept - pulling solid and hollow canes through the furnace.
- Workstation Setup
- Notes
- Iteration #1 - solid colored cane
- Iteration #2 - solid clear cane
- Iteration #3 - solid blue cane
- Iteration #4 - hollow clear tube
- Session #2 Lengthening. - Technique trials 1 - pulling solid and hollow canes through the furnace using different techniques.
- Workstation Setup
- Notes
- Iteration #1- solid blue cane
- Iteration #2 - solid blue cane with 2 people
- Iteration #3 - Anna's hollow cane 1 person
- Iteration #4 - Anna's hollow cane 2 people
- Session #3 Lampworking. - Material trials 1 - building glass on different kinds of wire and bending it.
- Workstation Setup
- Notes
- Iteration #1 - building on brass, solid cane
- Iteration #2 - building on brass, hollow cane
- Iteration #3 - building on iron
- Iteration #4 - building on copper
- Iteration #5 - building on galvanized steel
- Session #4 Lampworking. - Technique trials 2 - different ways of adding glass to wire and then bending.
- Workstation Setup
- Notes
- Iteration #1 - lamp-winding
- Iteration #2 - embedding
- Iteration #3 - covering
- Videos
- Extra Notes/Analysis
Recipe
Transcription
<page>006v</page>
<image>http://gallica.bnf.fr/ark:/12148/btv1b10500001g/f18.image</image>
<div>
<id>p006v_a1</id>
<head>Pour <del>ga cach</del> cages</head>
<ab>Tu les peulx embellir avecq des <m>canulles</m> d<m>esmail</m> de diverses<lb/>
couleurs en revestant le <m>fil darchal</m> ou de <m>fer</m> desdictes canulles<lb/>
Lesquelles tu rompras nettement a telle longueur que tu vouldras<lb/>
si tu encoches un petit lendroict a rompre avecq une <tl>lime</tl> qui<lb/>
couppe Et ne se rompront poinct en aultre endroict Tu les peulx<lb/>
courber avecq un modelle de <m>bois</m> sur un rechault ou bien a la<lb/>
chaleur de la <tl>lampe</tl> Il se tire aussi si long que tu veulx da{n}s<lb/>
un petit <tl>fourneau</tl> faict comme un <tl>four de reverberation</tl> qui<lb/>
touteffois est perce des deulx costes Et quand la grosse canulle<lb/>
est rouge ilz empoignent le bout chault avecq des <tl>pincettes</tl> a<lb/>
long bec de sorte quune poincte du bec de la pincette entre deda{n}s<lb/>
le bout de la canulle & par ainsy il salonge sans se boucher<lb/>
& laultre bout de la canulle se tient avecq la main pourceque<lb/>
elle nest poinct chaulde Quand la canulle est assez estiree<lb/>
celuy qui travaille assis ayant son <tl>fourneau</tl> de la gra{n}deur<lb/>
dun pot doeillets devant luy la rond & continue Cest pour<lb/>
faire canulles pour cappes qui se couppent comme dict est avecq<lb/>
la <tl>lime</tl> Les <pro>boutonniers aussi de verre</pro> saident dudit <tl>fourneau</tl></ab>
<figure>
<id>fig_p006v_1</id>
<link>https://drive.google.com/open?id=0B9-oNrvWdlO5eVFRYjVCTmczcmM</link>
</figure>
<ab>
<margin>right-middle</margin>
soubs la porte y a<lb/>
une grille qui soubstient<lb/>
le <m>charbon</m> allume<lb/>
& la <m>cendre</m> se vuies<lb/>
tournant du <tl>four</tl> ce<lb/>
dessus dessoubs</ab>
Translation
<page>006v</page>
<image>http://gallica.bnf.fr/ark:/12148/btv1b10500001g/f18.image</image>
<div>
<id>p006v_a1</id>
<head>For cages</head>
<ab>You can embellish them with <m>thin</m><m>enamel</m><m>canes</m> of various colors by covering the <m>yellow latten</m> or <m>iron</m> wire with said canes. These you will break neatly into the length that you want if you make a small notch with a cutting <tl>file</tl> at the point where you want to break them, and they will not break anywhere else. You can bend them with a <m>wood</m>en model over a brazier or by the heat of a <tl>lamp</tl>. A cane can be stretched out as long as you want in a small <tl>furnace</tl> made like a <tl>reverberatory oven</tl> but with openings on both sides. And once the large cane is red, they seize the hot end of it with <tl>small pincers</tl> that have long beaks, with one end of the beak inside the end of the cane, so that it may be stretched without becoming blocked. The other end of the cane is held with the hand, as it is not hot. Once the cane is stretched enough, the one who is working seated with his <tl>stove</tl>, the size of a carnation pot, placed in front of him, breaks it off and carries on. This is for making canes for capes, which may be cut, as already mentioned, with a <tl>file</tl>. <pro>Glass-button makers</pro> also use the said <tl>stove</tl>.</ab
<figure>
<id>fig_p006v_1</id>
<link>https://drive.google.com/open?id=0B9-oNrvWdlO5eVFRYjVCTmczcmM</link>
</figure
<ab>
<margin>left-middle</margin>
Under the door is a grill that supports the burning <m>charcoal</m>. The <m>ash</m> is emptied by turning the <tl>stove</tl> upside down.</ab>
Tools and Materials
- Artistic Wire 18-Gauge Non-Tarnish Brass Wire
- Iron Nail
- Copper Staple
- Galvanized Steel Paper Clip
- Thin hollow glass cane (2 types. session iteration 4 was done with a pipette. all other iterations with hollow cane done with tubes supplied by Anna Elizabeth Riley.)
- Thin solid glass cane
- Blowtorch - T4000 Bernzomatic Propane Torch to use as a “Lamp or Brazier”
- Pincers
- Firebrick
- Metal Tray
- Wire cutters
- Furnace - built by Joel and Ana Matisse on 11/18/16 from fire bricks, metal wire, and steel plates from lab inventory. - For the internal research on the design of our furnace see my Research Notes.
- Heat Source = Blowtorch - T4000 Bernzomatic Propane Torch
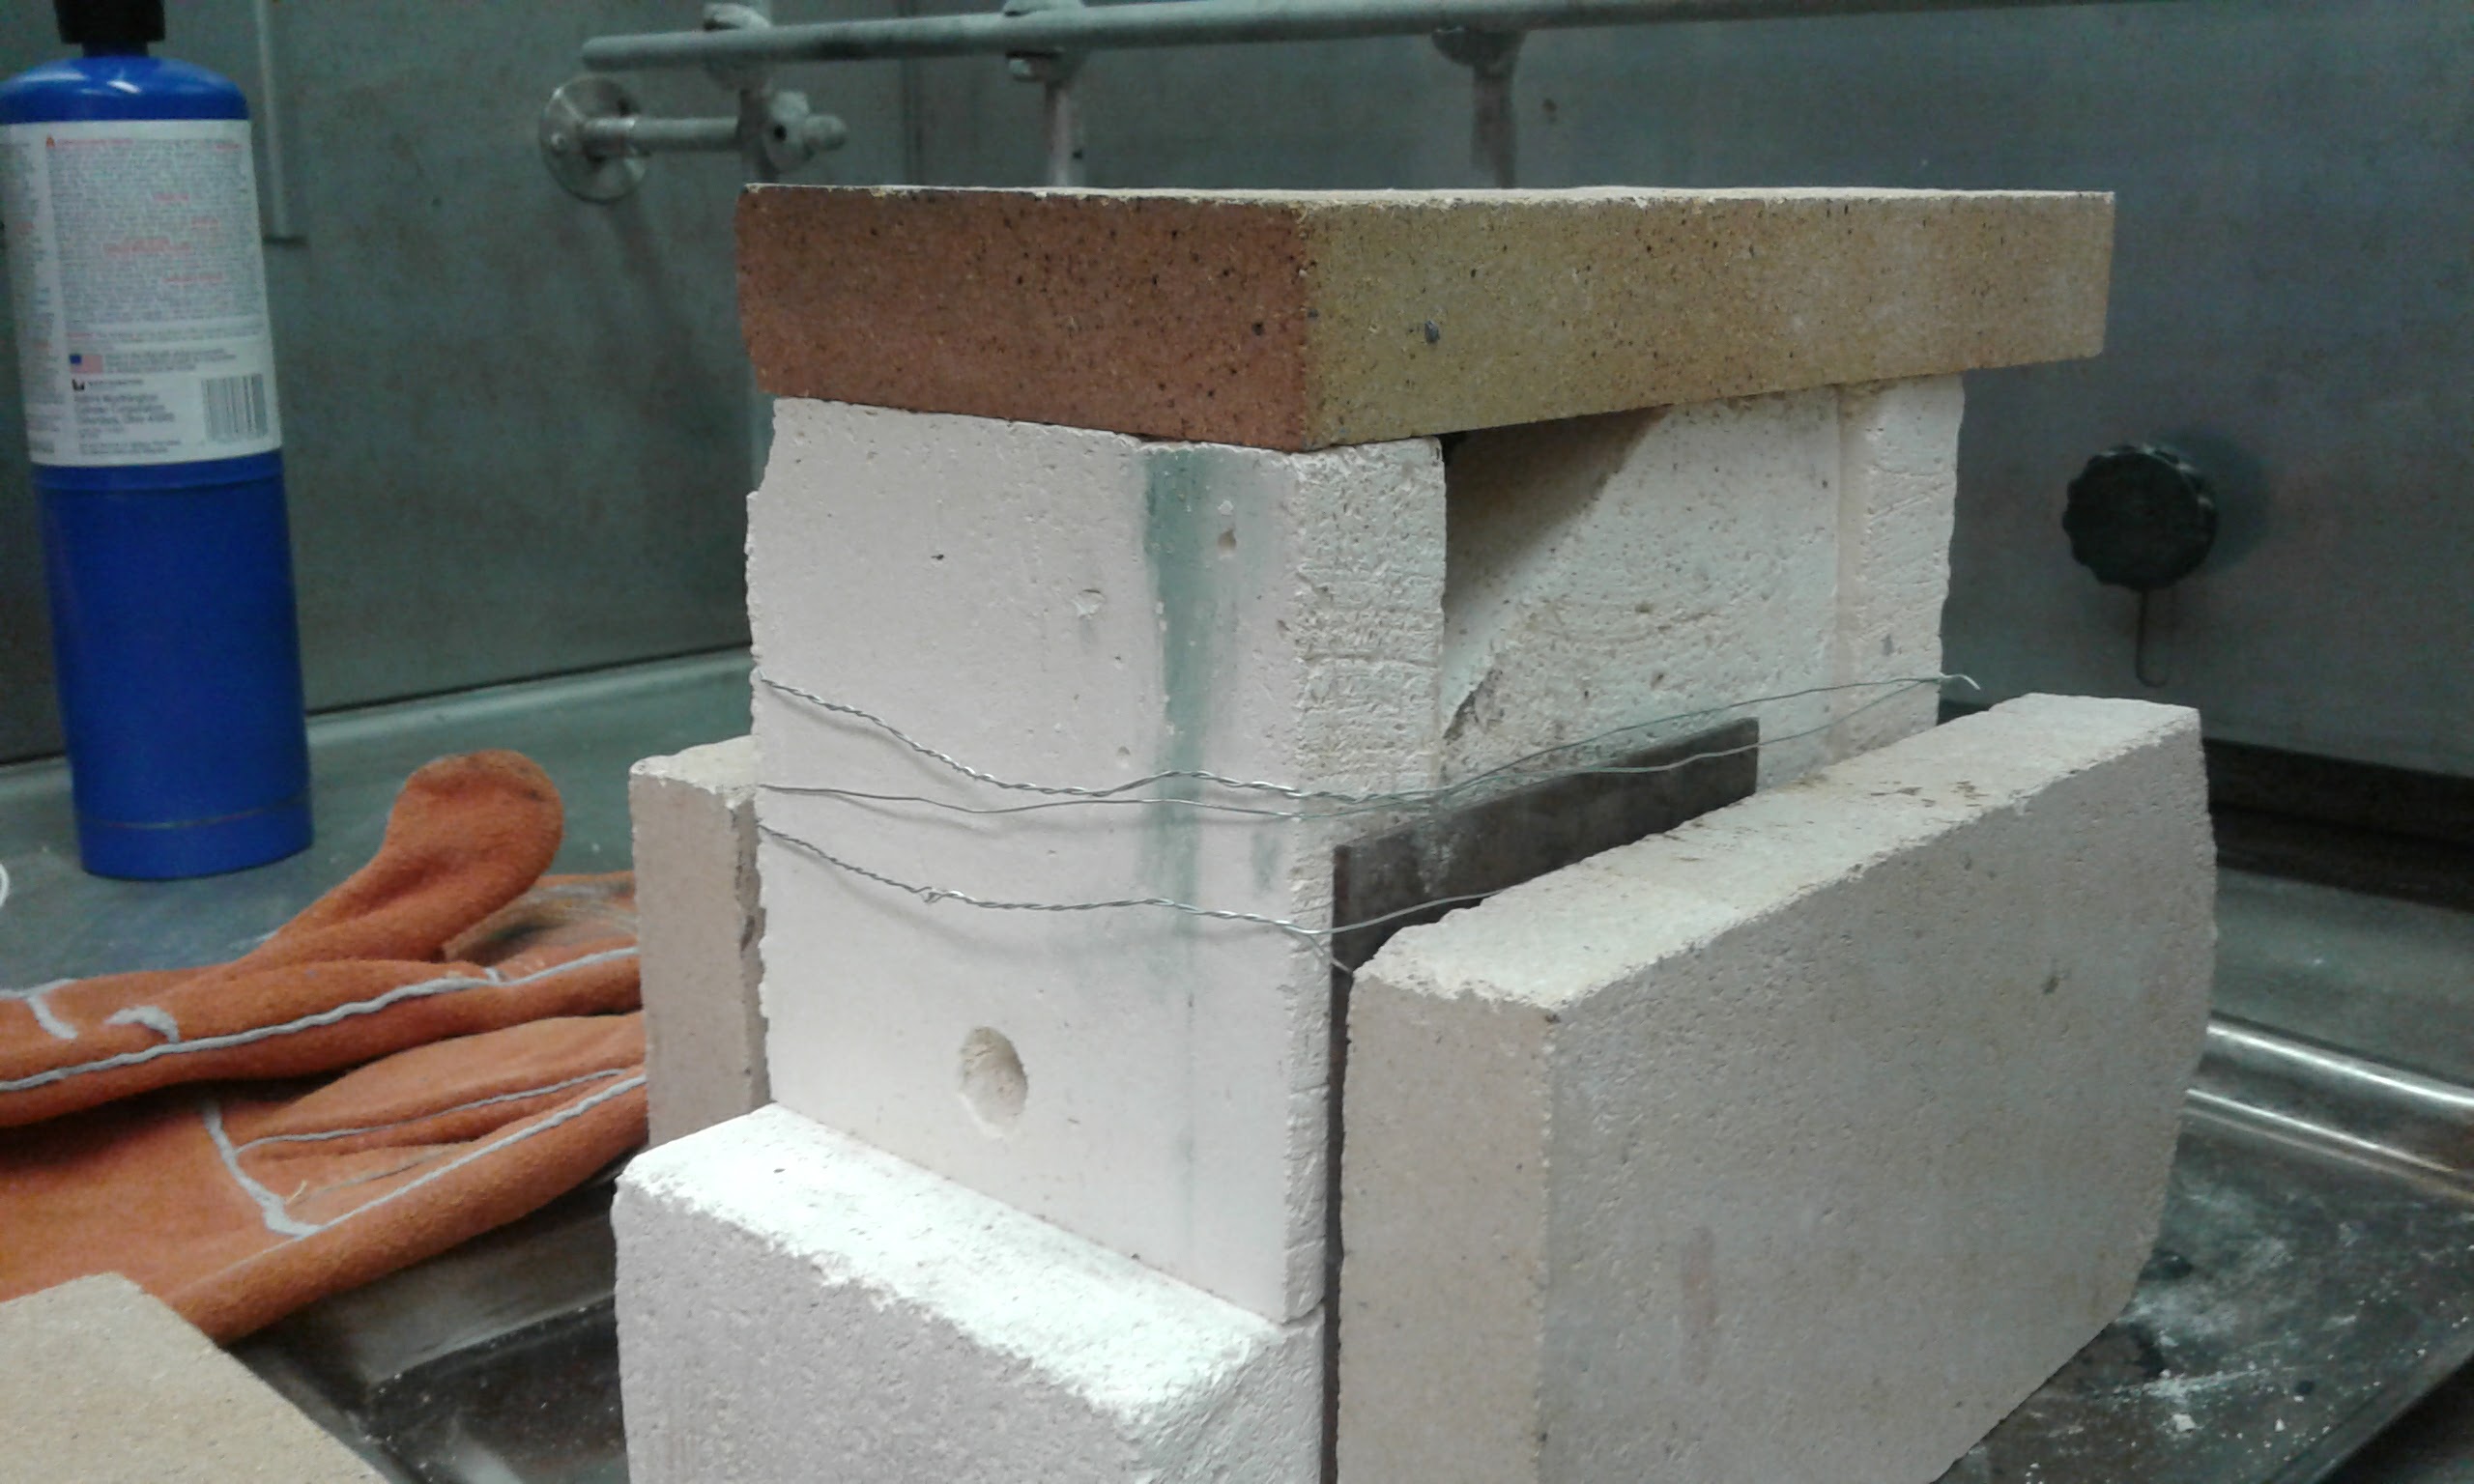
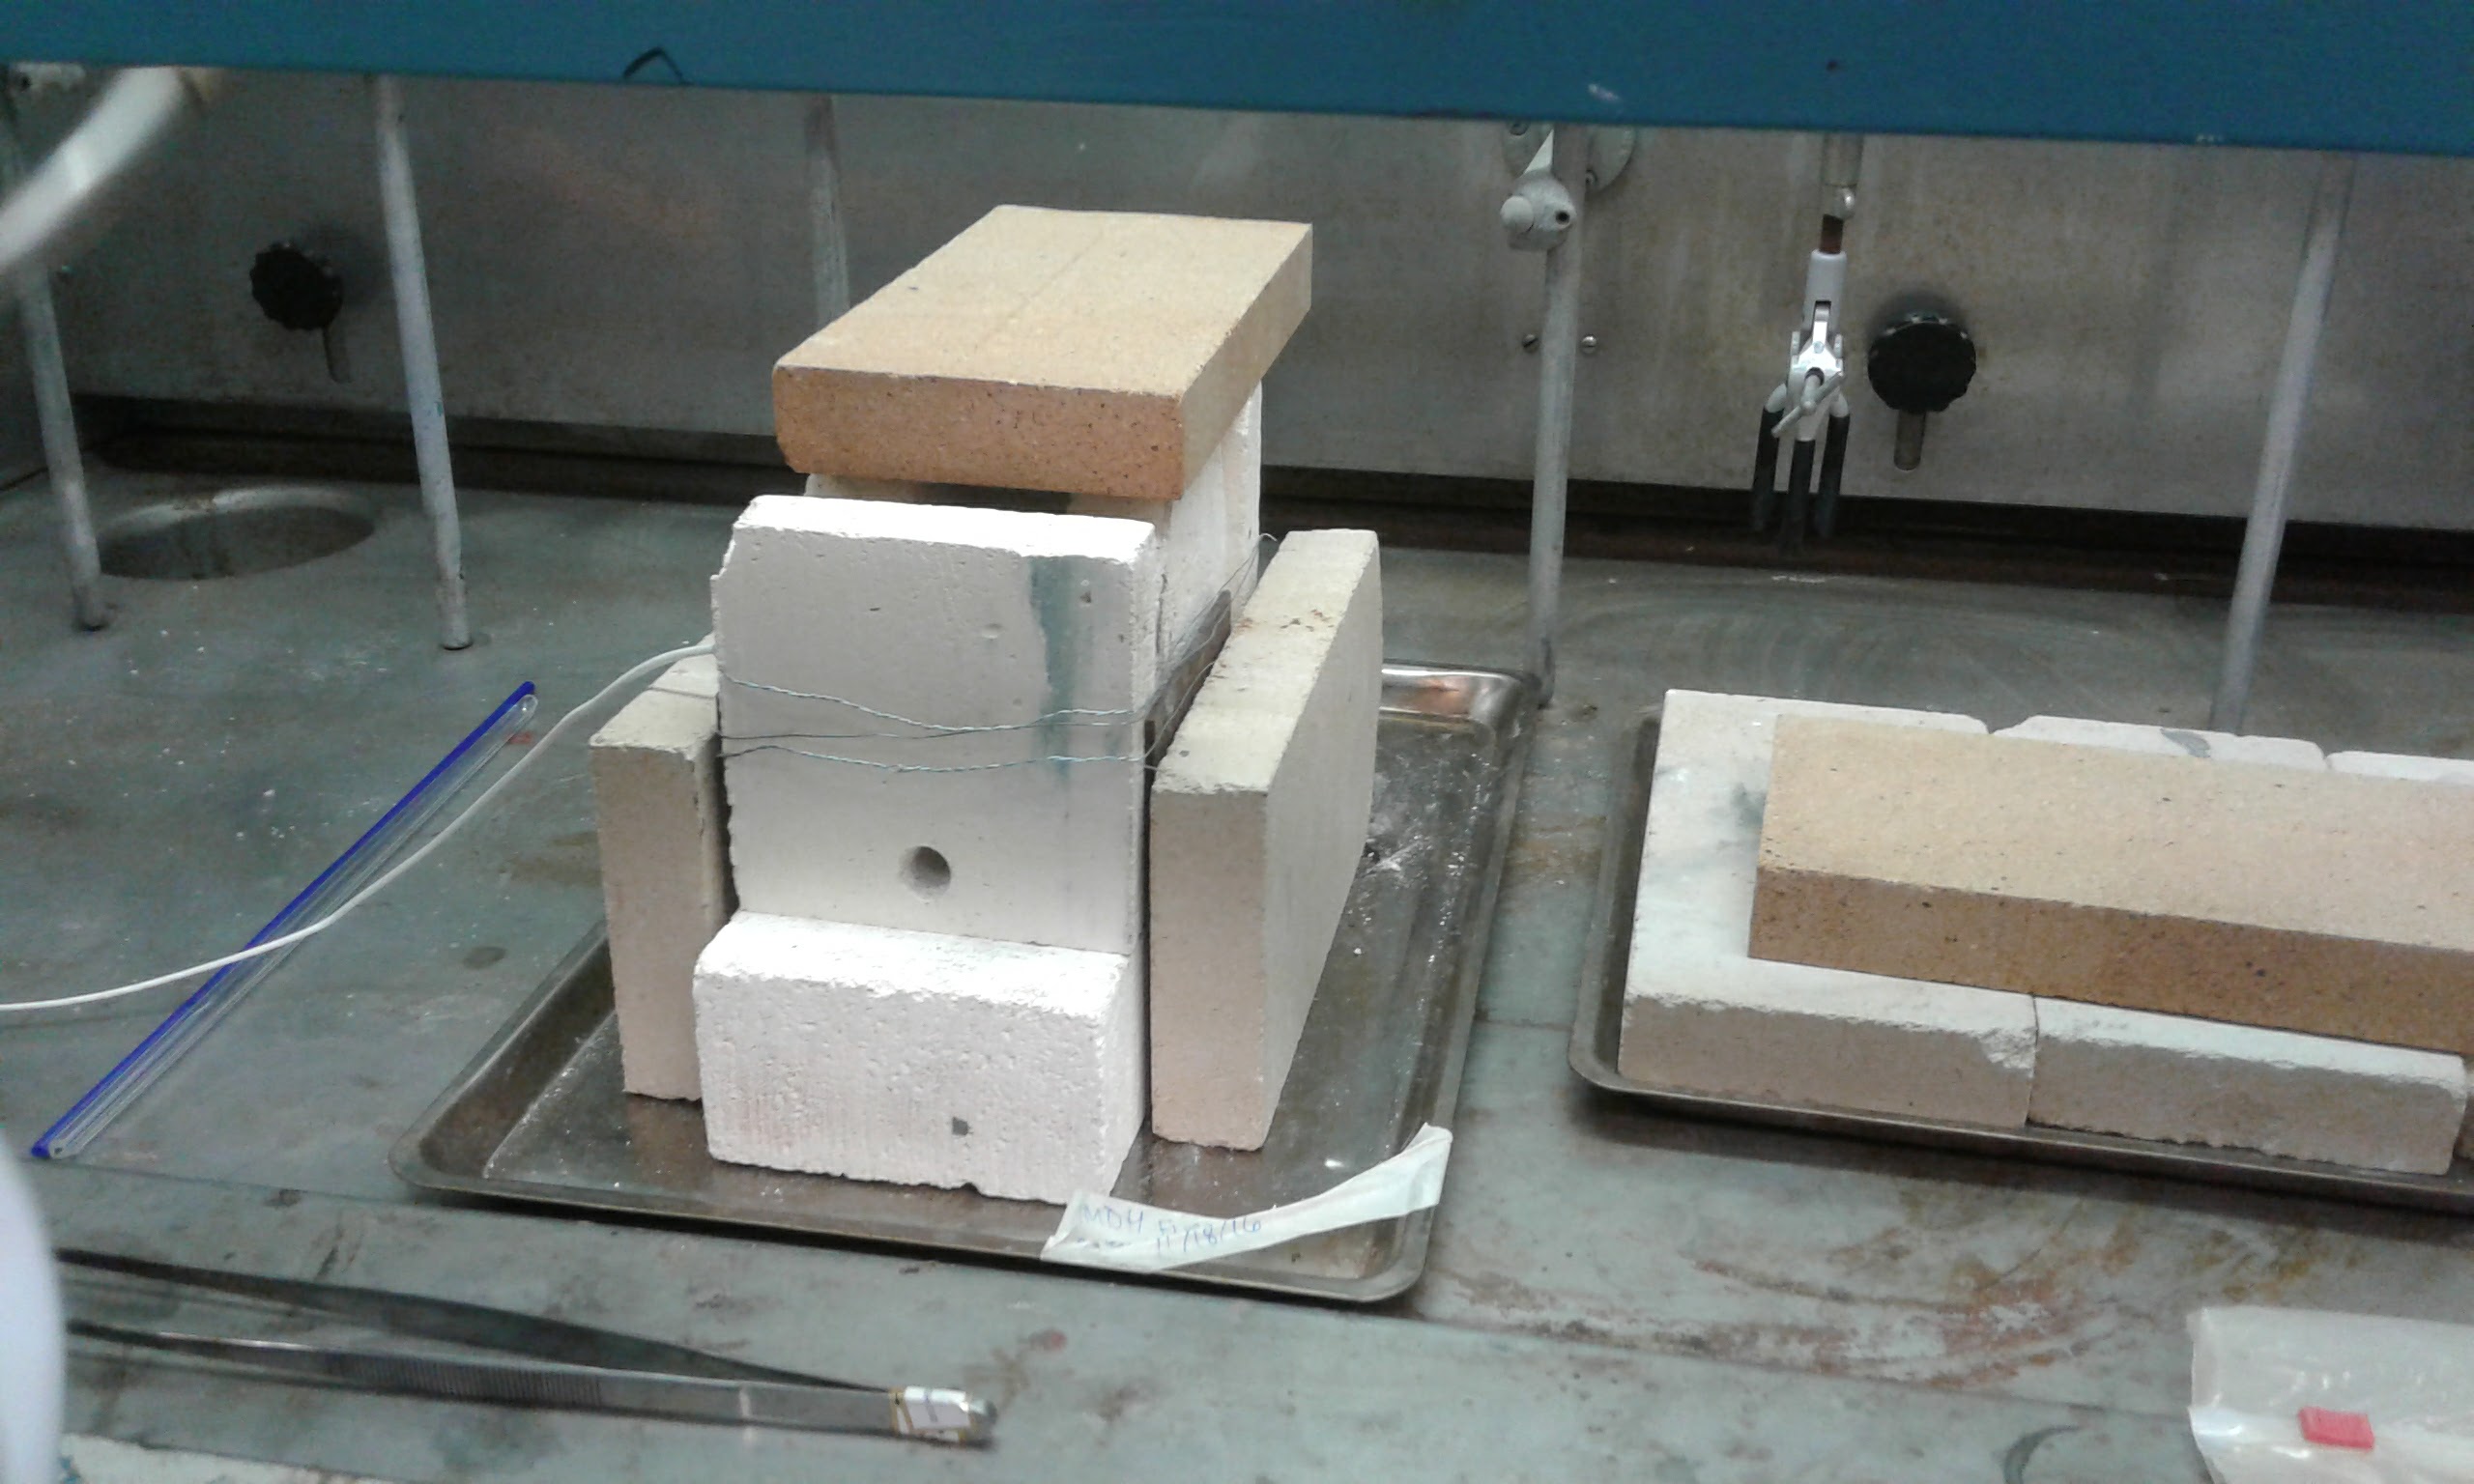
Furnace in fume hood top: furnace lid fully on bottom: furnace lid open
- Pincers - metal, not sure what kind.
- Metal shears (in case glass does not snap and it must be cut).
- Lab thermocoil for temperature measurements.
- Didynium tinted glasses.
- Face shields.
- Fire-retardant gloves and apron.
Session #1
Place: Lab
Participants: Ana Matisse Donefer-Hickie, Anna Elizabeth Riley Joel Klein
Date: Nov. 28, 2016
Workstation Setup:
- We will set up the furnace under the hood.
- Hood should be cleared and swept for flammable materials.
- Red ABC Fire extinguisher for general use and fire blanket placed near to the fume hood for easy access - on top of refrigerator.
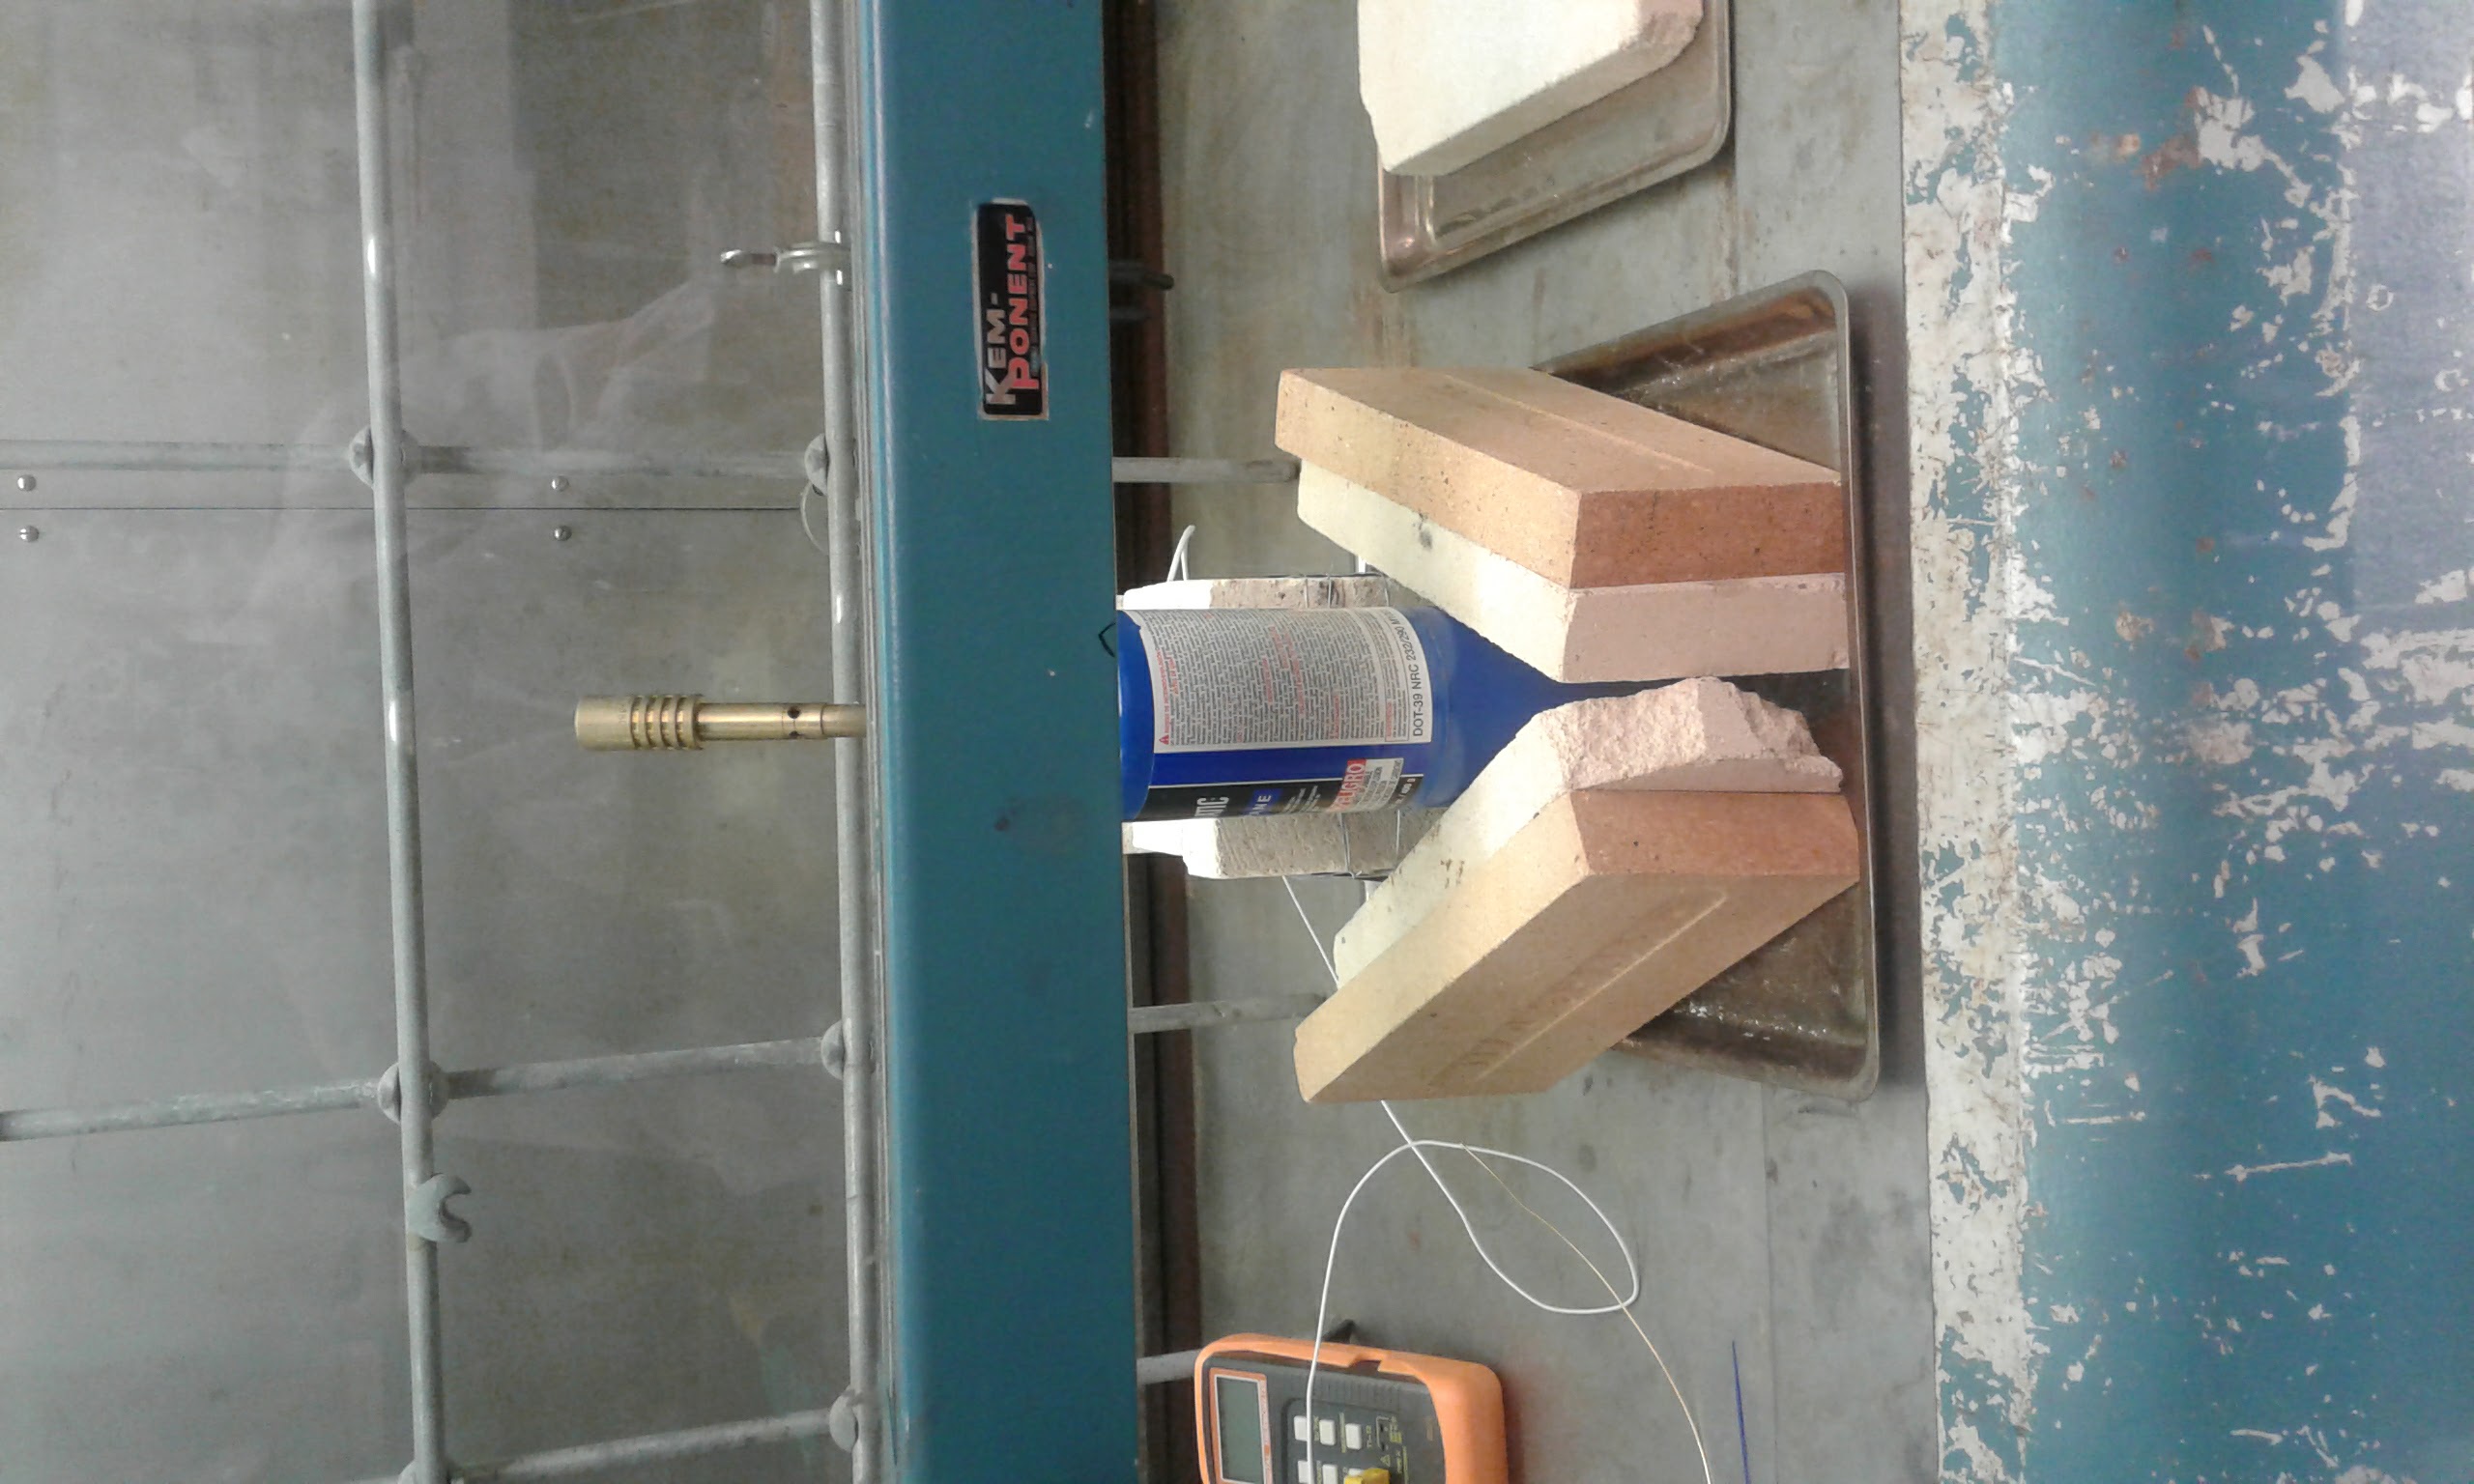
- Furnace will be placed near the center, so there is plenty of room for participants to work on either side. The furnace will be placed perpendicular to the front of the hood to increase visibility of the hole through which we will pull the cane, and so that in iteration 2 one person can stand on one side of the furnace and pull the hot cane through with pincers while another holds the cold rod of glass with their gloved hands. Thermocoil will be inserted near to the entrance to the furnace (where the cane is inserted) to measure temperature. [AMENDED] - furnace switched around so blowtorch and holes are now on the same side. Change made for ease of workability and safety concerns.
- A tray holding a layer of firebrick will be placed to the right of the furnace for disposal of the pulled bits of cane, which will cool very quickly when placed on the firebrick.
- Pincers will be placed next to the furnace for easy access.
- Shears will be placed next to the furnace for easy access.
- The furnace is powered by a single blowtorch, which will be held by a third participant (Joel!). The furnace will be oriented so that the opening for the torch is towards the back of the hood. [AMENDED] This is an attempt to minimize crowding at the front of the hood.
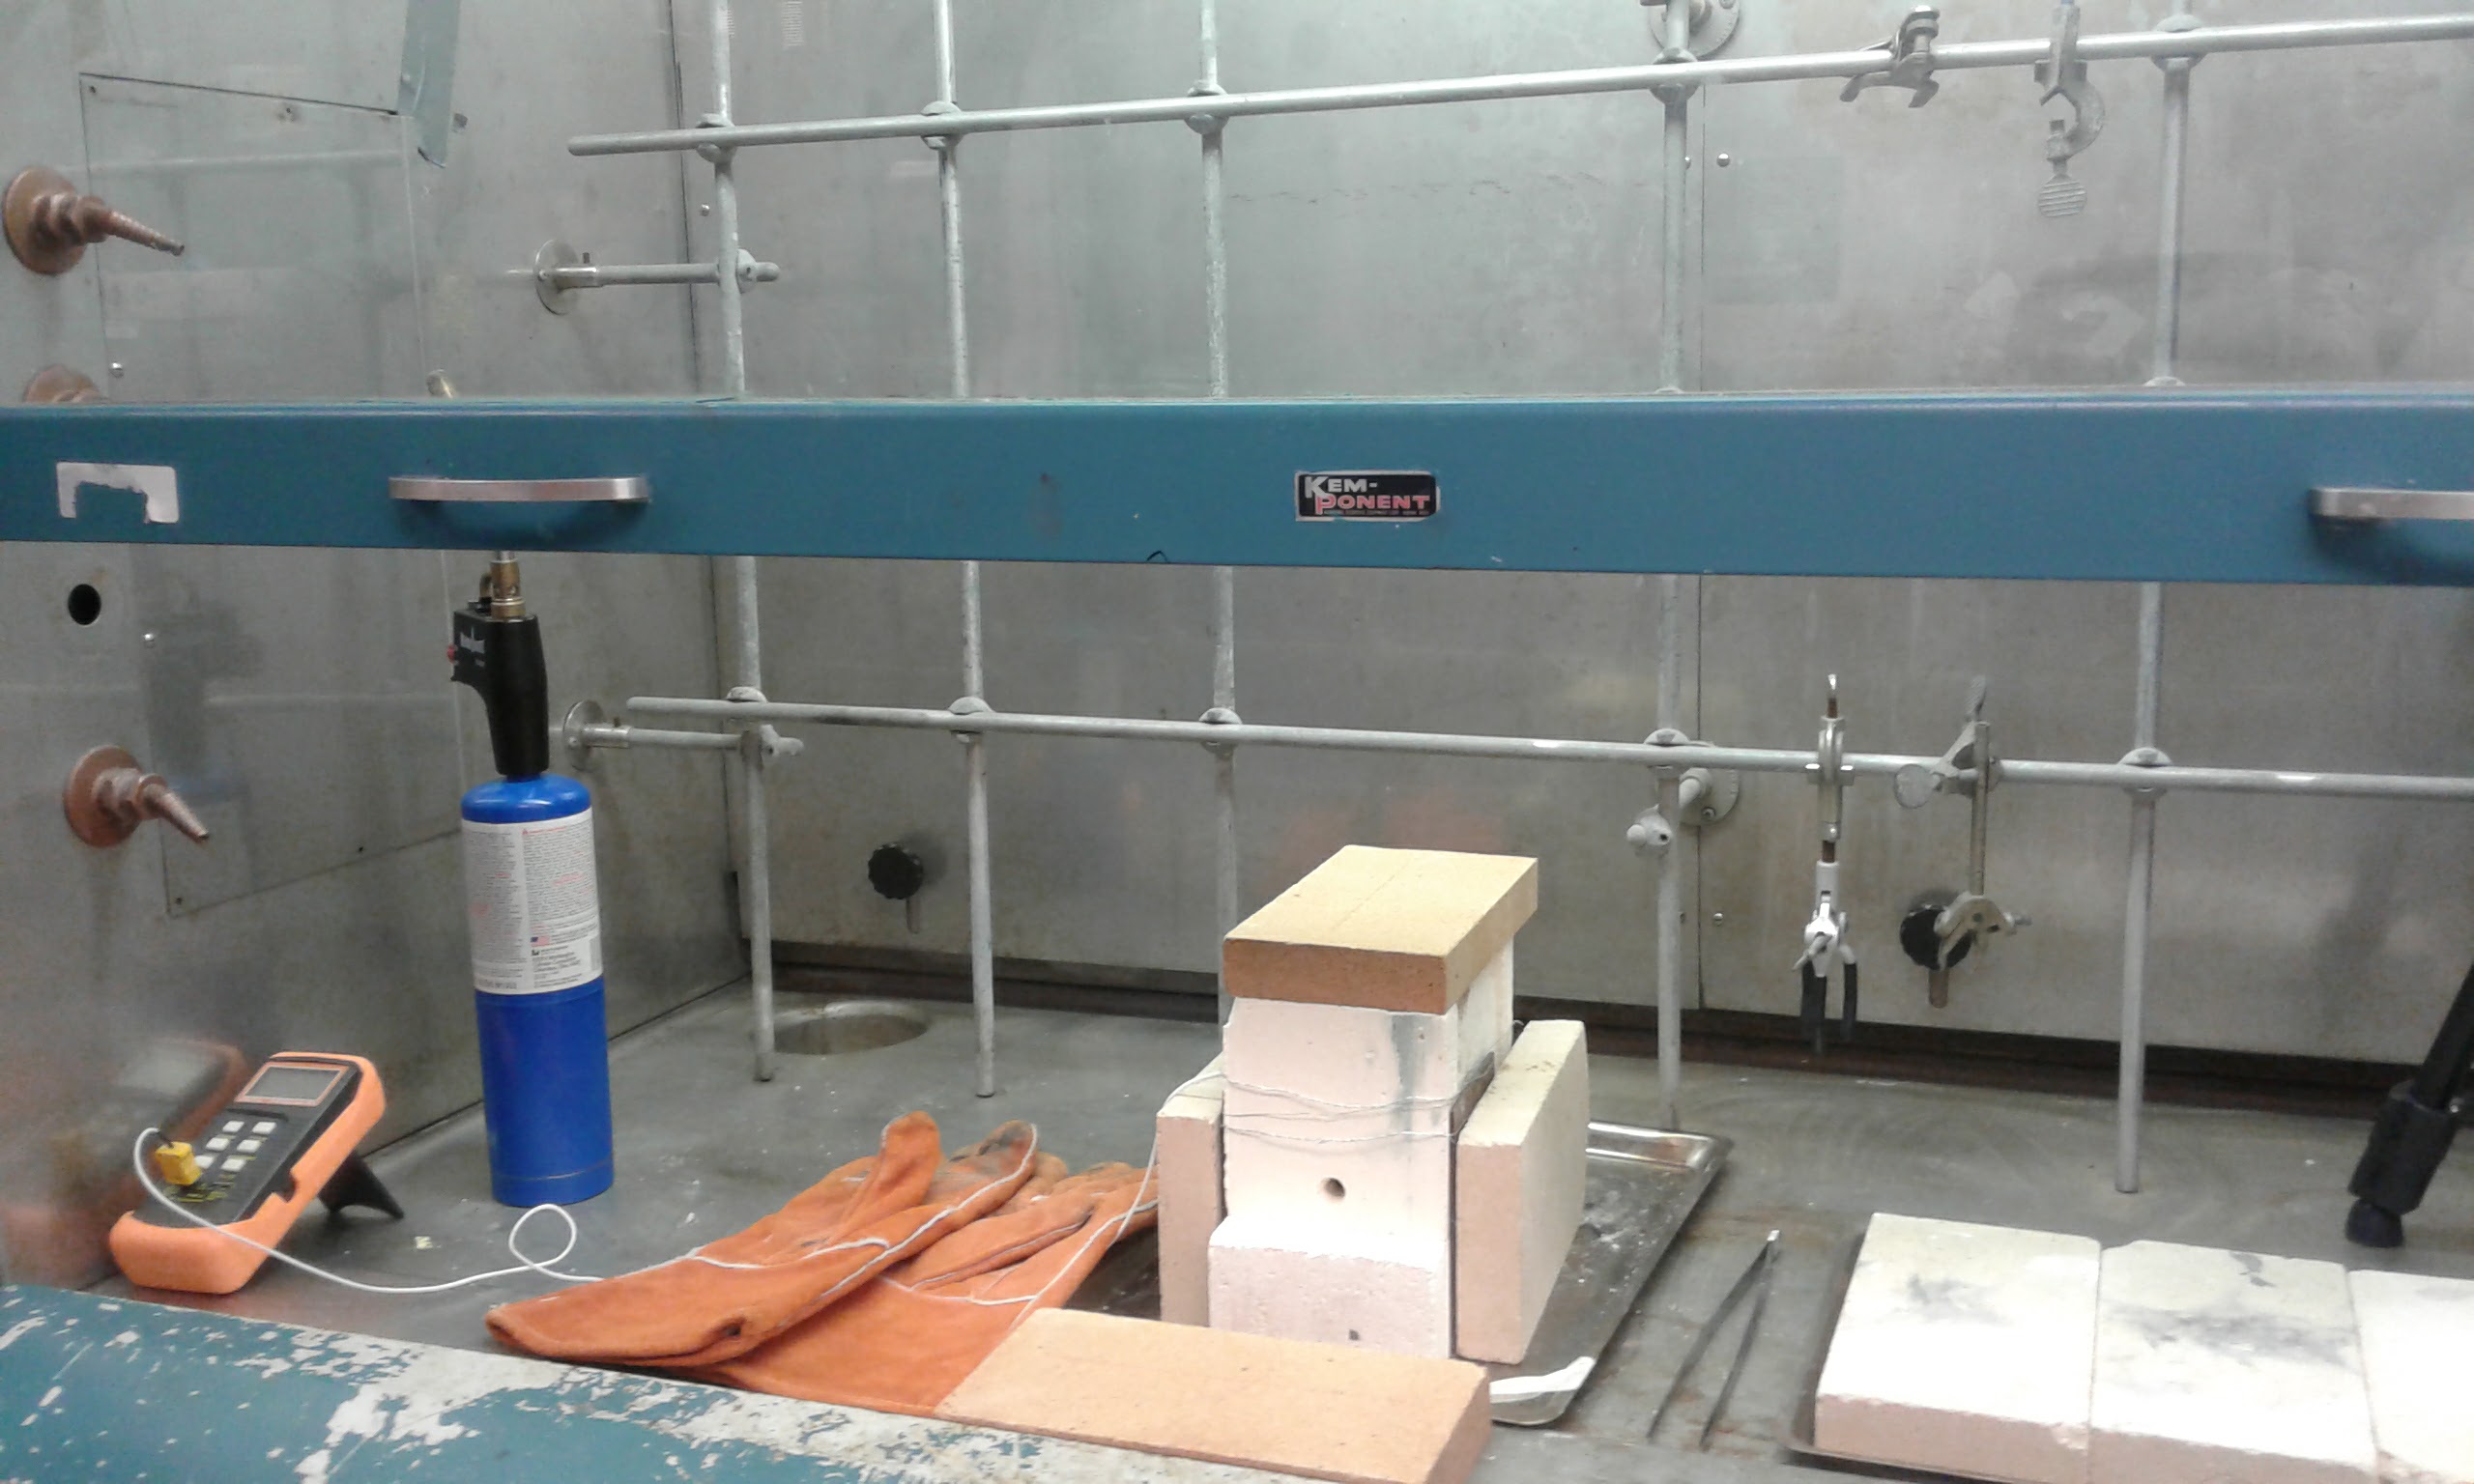
Workstation setup with furnace for session #1and2
Notes:
[AMDH] - for this first session we amended the plan significantly as we went. All changes are reflected in the comments.
Iteration #1: Two Participants - Solid Colored Cane
[AMDH] - for this iteration we used solid blue cane.
- Set up workstation.
- Set up camera on tripod (either inside or outside hood) to document process.
- Turn on furnace - blowtorch is inserted into hole and turned on.
- Furnace left to heat ~ 5 mins.
- [AMDH] Blow torch ran out of fuel. Joel had to reattach a new cylinder.
- Temp. is taken at ~5 min intervals.
- [AMDH] We set our goal temp. to about 600C (Mostly arbitrarily. This kind of glass starts to become workable around 580C). Heat got to 600C after 3 min and 7s.
- Once furnace is hot enough to render the glass malleable (~580C - might be less because we are working with such small amounts), cold glass cane will be tapped slowly into the hole in the side of the furnace. Glass is tapped to prevent weak spots from cracking off.
- [AER] laser pyrometer read on glass surface 1:11pm at 231C.
- [AER] FURNACE TEMP MEASUREMENTS: 1:11pm - 700C; 1:12pm 722C; 1:13pm - 736C; 1:15pm furnace off.
- Once glass is hot enough to be malleable, it will be kept stationary at one side of the furnace.
- [AMDH] glass became very malleable at around 722-736C. I had to insert the glass into the furnace to heat it properly.
- Pincers will be inserted through the other side to grasp the malleable glass.
- [AMDH] Because of the lid on top of the furnace visibility was very bad. I had to insert the cane all the way through the furnace in order to be able to grasp it with the pincers. It was too difficult to grasp the cane inside the furnace by feel. This made it difficult to get a good grip on the end of the cane because it was still pretty cold.
- Glass will be pulled through the furnace into a cane as long as possible (given the space within the hood and AMDH’s armspan).
- [AMDH] was really difficult to pull an even cane. I tried to keep turning the cane so that it would not be pulled down into the furnace by heat and gravity. This was difficult to do with the leather gloves I was wearing because it was difficult to keep my grip. I had to use a large range of motion to pull the cane. Only the cane that was in the furnace was hot enough, resulting in a very tapered, uneven stringer.
- “Breaks it off and carries on” - Once the cane is pulled, it will be snapped from the larger cane (providing it is thin enough. If it is too difficult to snap it will be cut with shears) and pulled the rest of the way through the oven.
- [AMDH] the first cane was pulled off by heat so it is uneven - one end is very thin and the other still very thick.
- Canes will be placed to cool on the fire brick on the metal tray.
- [AMDH] I placed the first stringer (thin pulled cane) on the fire brick to cool and pulled another one with the thick cane that was still in my left hand. It was easier the second time as I got used to the feeling of holding and turning the canes and the pincers in my gloved hands.
Iteration #2: Solid Clear Cane
[AMDH] - for this iteration we used solid clear cane.
- Furnace left to heat ~ 5 mins.
- [AER] - furnace started at 1:25pm and clear rod inserted.
- [AMDH] again it was very difficult to determine heat by feel. I think I was only able to because of my previous familiarity with the material.
- Temp. is taken at ~5 min intervals.
- [AER] 1:26pm 650C - glass already quite malleable.
- [AMDH] it is easier to heat this cane than the blue but I have to keep removing it from the furnace to see how it is behaving. I grasp one end with the pincers and am surprised to find that it is quite malleable already. So far we haven't had any problems with thermal shock. When I try to pull the stringer, though, it is not yet hot enough to move. There is a difference between the glass being malleable and being hot enough to pull into a stringer.
- [AER] 1:27pm 672C
- [AER] 1:29pm 748C
- [AER] 1:30pm 803C - torch turned off to drop temperature because the glass was heating too fast and pulling too quickly, resulting in very thin stringers.
- [AMDH] I don't feel like the glass needs to be turned so much because the pulling action keeps it taut.
- [AER] 1:31pm 615C and dropping. torch turned back on.
- [AMDH] changes in heat have a direct effect on how easy/hard it is to manipulate the glass. There really is a sweet spot. It does not surprise me that the a-p wanted a furnace that could provide an even heat..
- [AER] 1:33pm 800C
- [AMDH] I pulled 3 stringers from one glass rod and there was a portion of rod left over. All 3 stringers were left to cool on the fire brick. I used the same technique for all of them, inserting the cane all the way through the hole in the furnace so I could grab one end with the pincers and pull the glass that was in the furnace, since it was the only part of the cane that was hot enough to move.
Iteration #3: Solid Blue Cane - FURNACE ROOF MOVED
[AMDH] after consulting the recipe again, we moved the roof of the furnace back a little bit so i could see the cane in the furnace (since the a-p directs the reader to seize the hot end of the cane once it is "red hot" - a visual instruction - and the roof of the furnace of the diagram in open). We had the roof enclosed because we were afraid of losing heat, but since the furnace was so hot anyway after the first two iterations we weren't so worried about that anymore.
[AER] - goal: keep closer to the formula by keeping the end of tube inside the furnace when grabbing with pincers.
- [AER] 1:40pm - furnace turned on so that the temp doesn't drop too much.
- [AER] 1:41pm - glass feeding begins 650C
- [AMDH] it is SO MUCH EASIER to pull the cane when I can see it get hot in the furnace. The visual cue is really helpful, since it is so hard to tell by feel when the glass is ready, even for someone familiar with the material. I am able to pull much more even and longer stringers when I can observe the color of the glass as the heat changes.
- [AMDH] - makes AER and I wonder what color glass he was using. I think it's likely he was using solid colors, probably blue since that color is prevalent in archeological remains and 16th c extant objects. Could also have been translucent blue or white, also common colors. [AER] - colored glass glows red, clear glass turns amber yellow, not red.
- [AMDH] I could have pulled a cane as long as my wingspan with the help of the visual cue of the color of the glass as it heats.
- [AER] 1:47pm - end 750C.
- [AMDH] - furnace off.
Iteration #4: Hollow clear tube
- [AER] - 1:53pm - 578C - furnace off.
- [AMDH] pipette was inserted very carefully because I wasn't sure how it would react to being heated since it is not a kind of glass made for lampworking that i have used before.
- [AMDH] - no thermal shock. It heated fairly quickly. No significant change in color, though it took on a yellow tinge like AER said it would. It was surprisingly easy to heat and pull the pipettes. They cooled very quickly but also heated very quickly so I had to keep it in the flame if I wanted it to stretch. I was able to pull it into very long, thin hollow tubes.
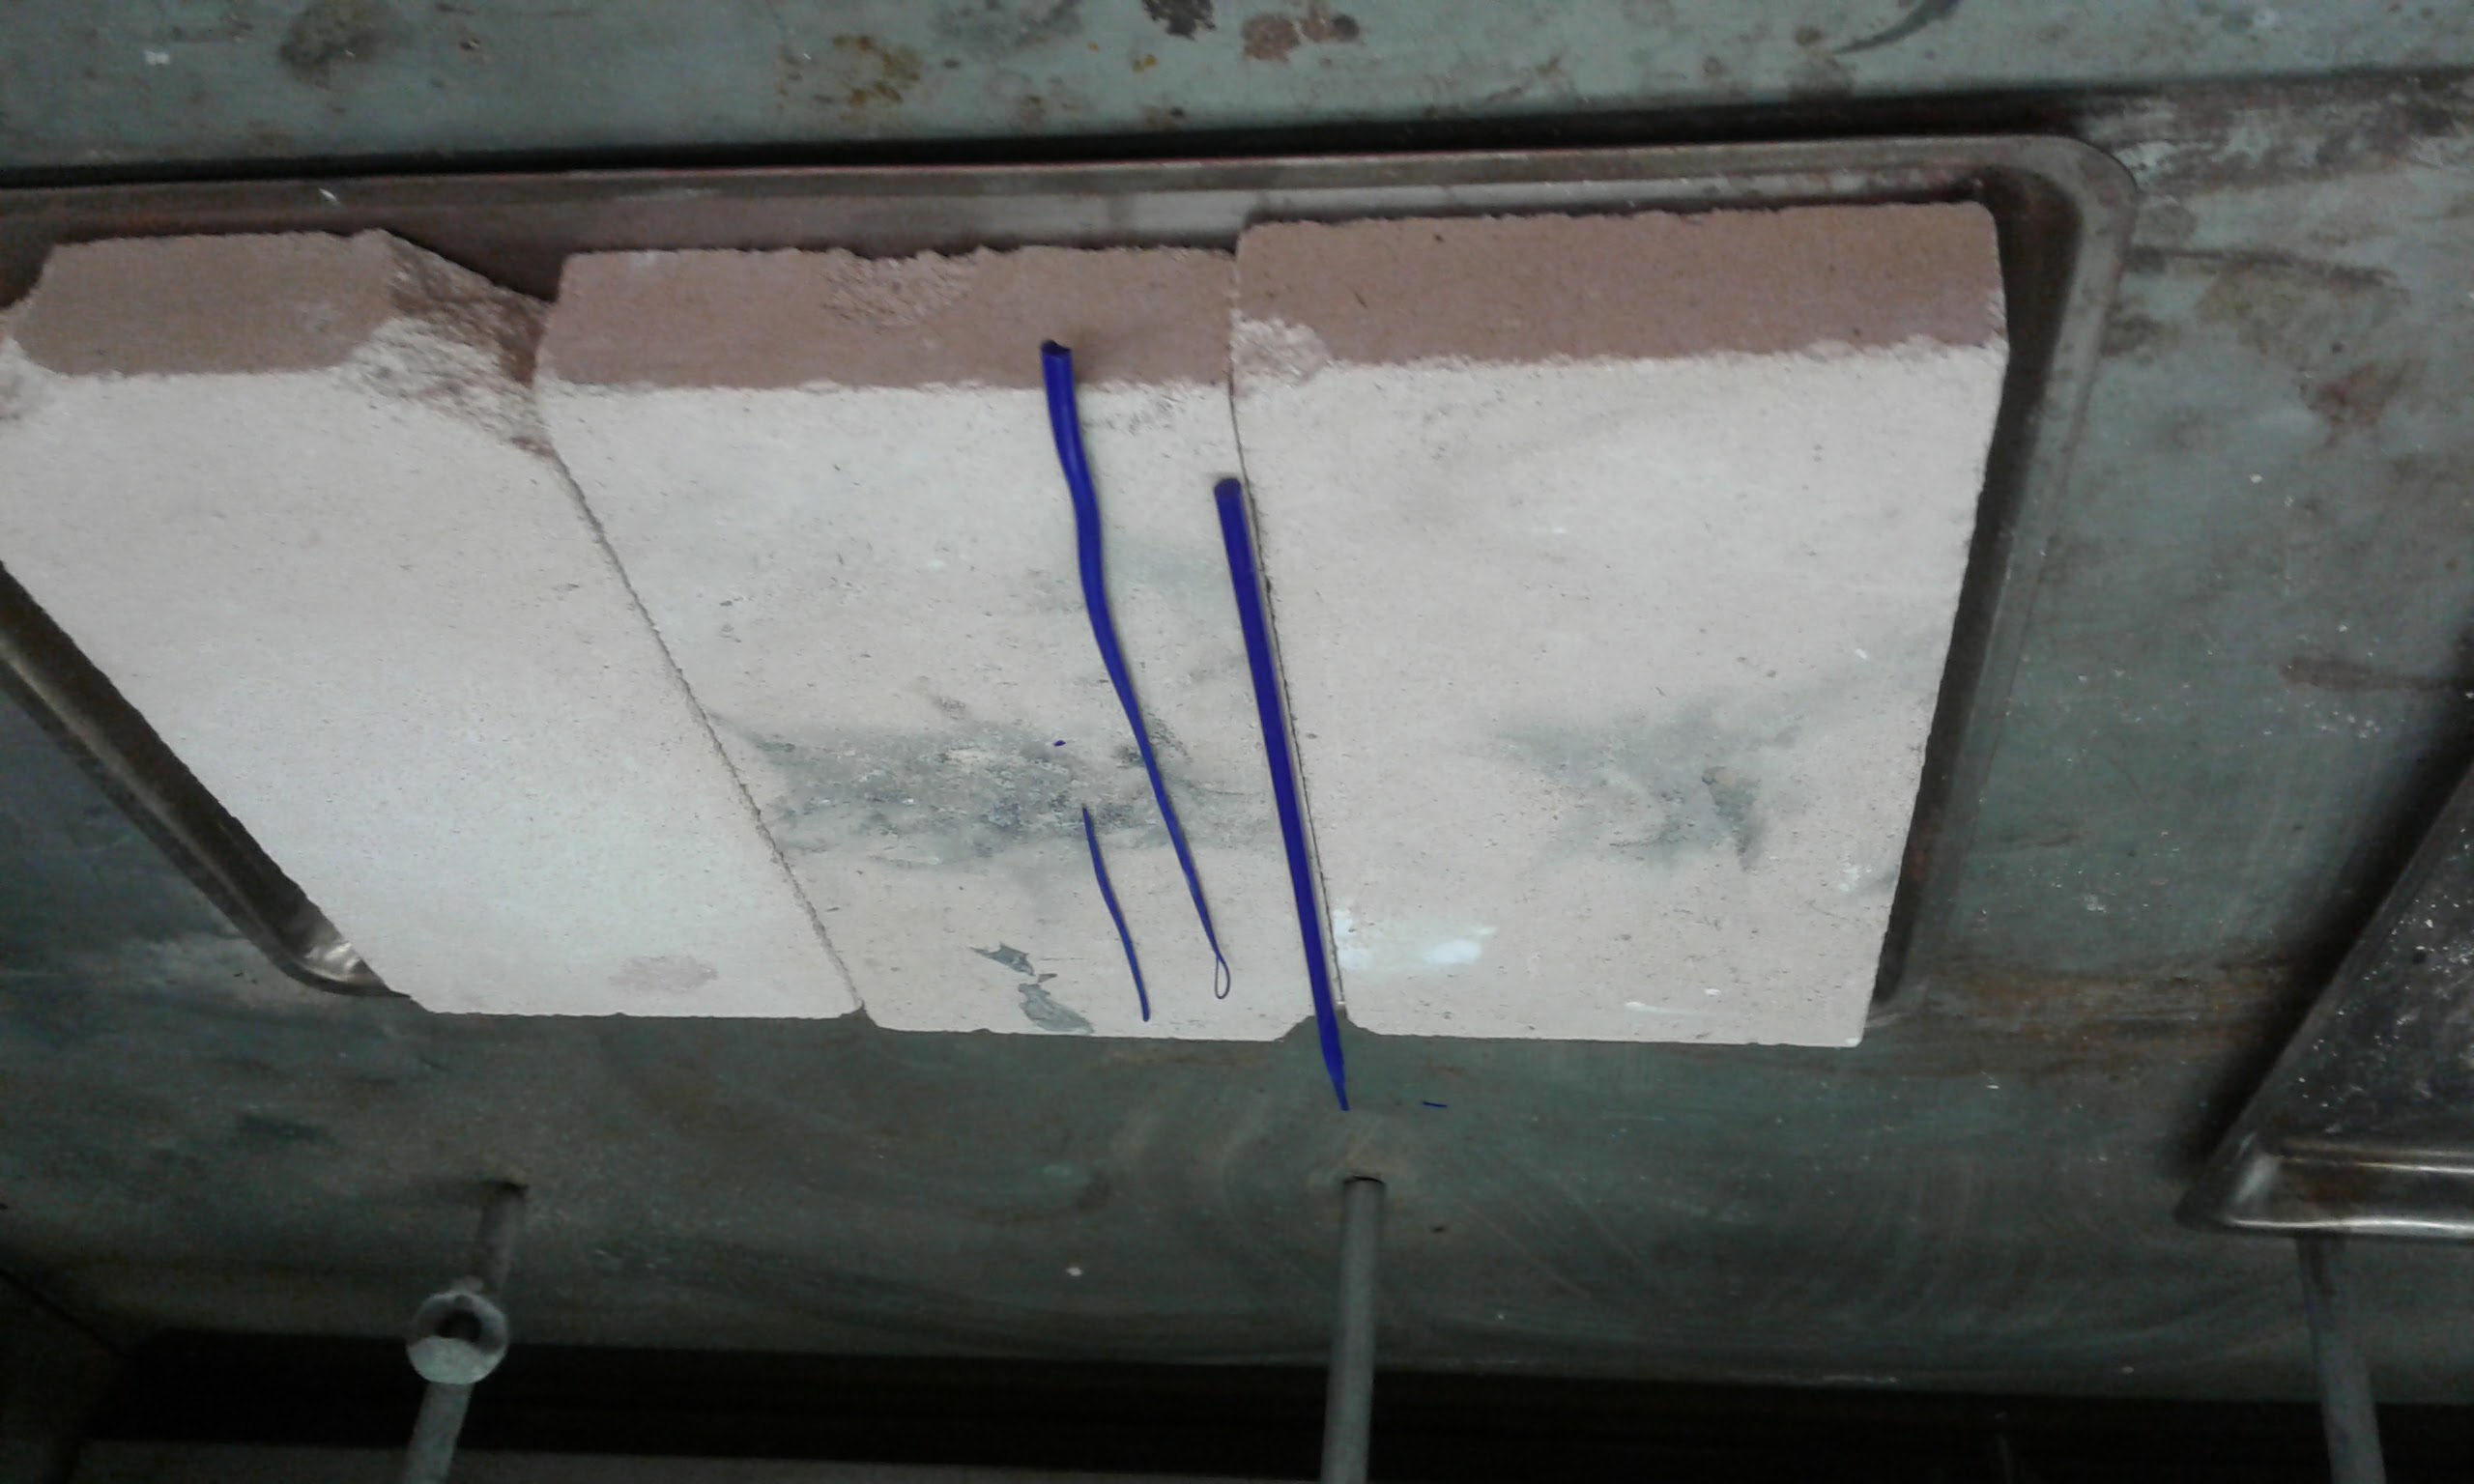
Proof of concept trials from session 1.
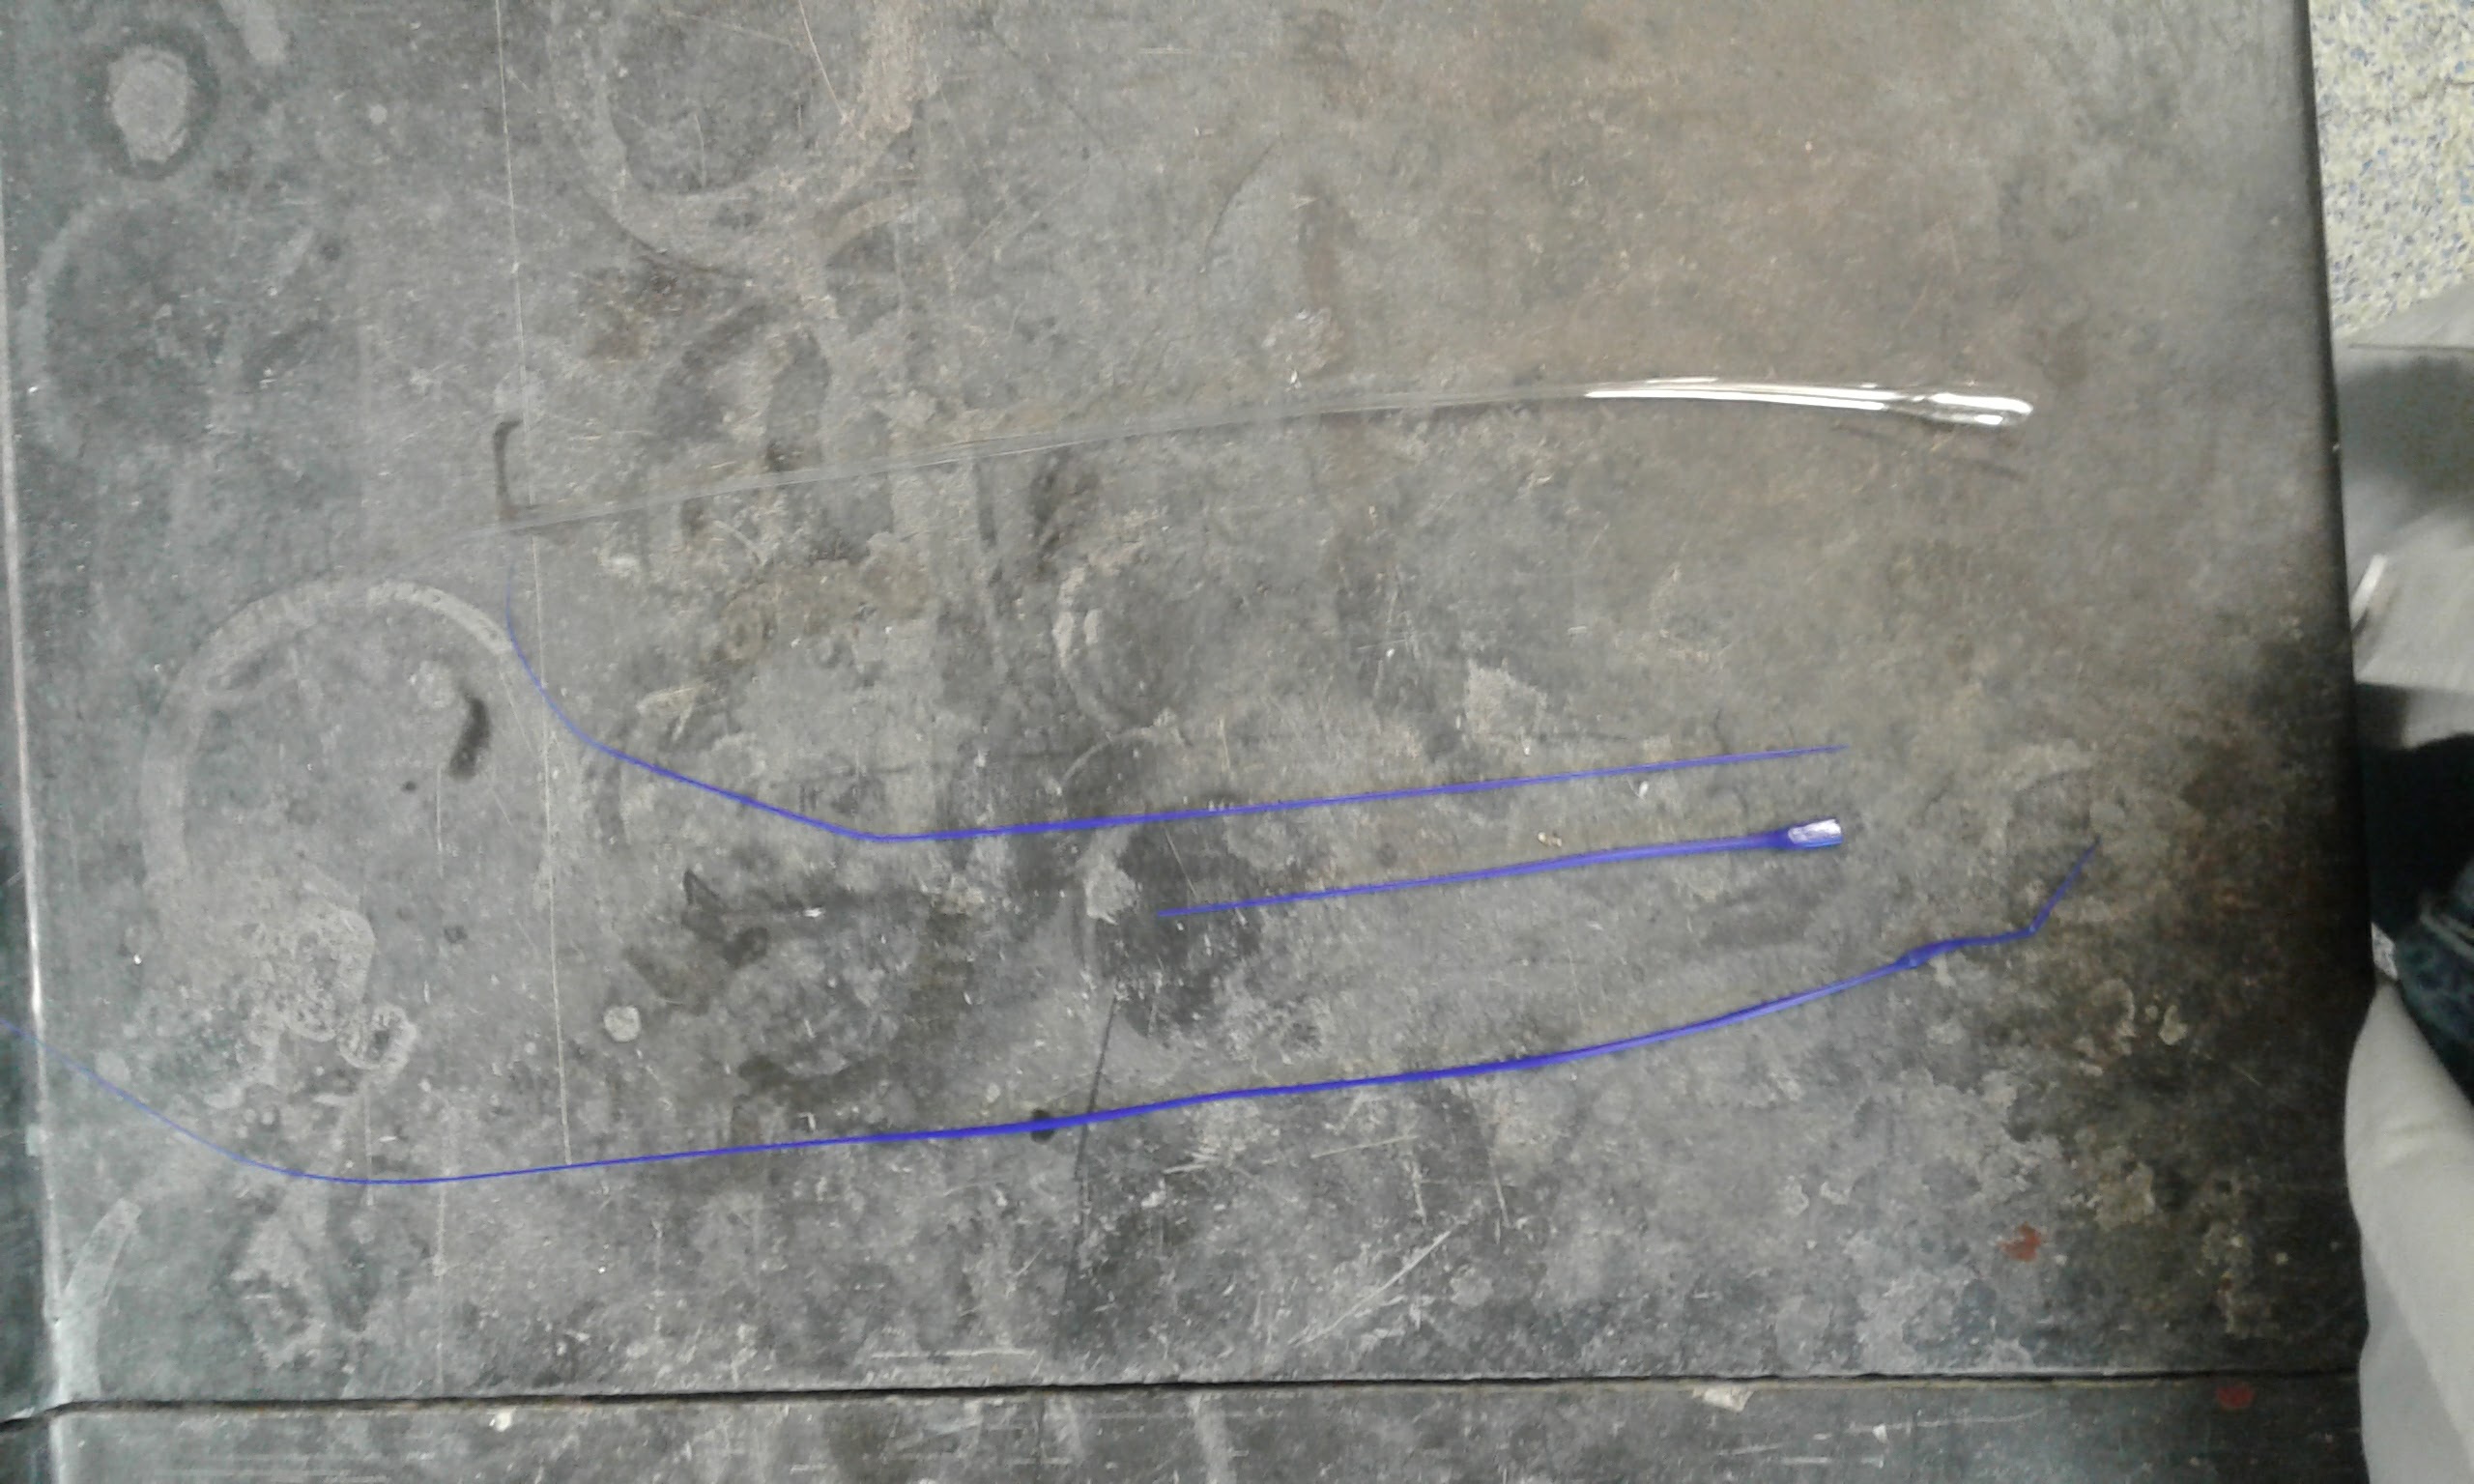
Some pulled canes from session 1. The one on the bottom is from an early trial. It is not straight. The other two blue canes are from later trials. They are straighter.
Session #2
Place: Lab
Participants: Ana Matisse Donefer-Hickie, Joel Klein, Caitlyn Sellar
Date: Nov. 28, 2016
Workstation Setup:
- Same as Session #1
Pulling thin cane for trials on Friday.
Blue cane and new clear cane from Anna.
Goal: pull thinner canes.
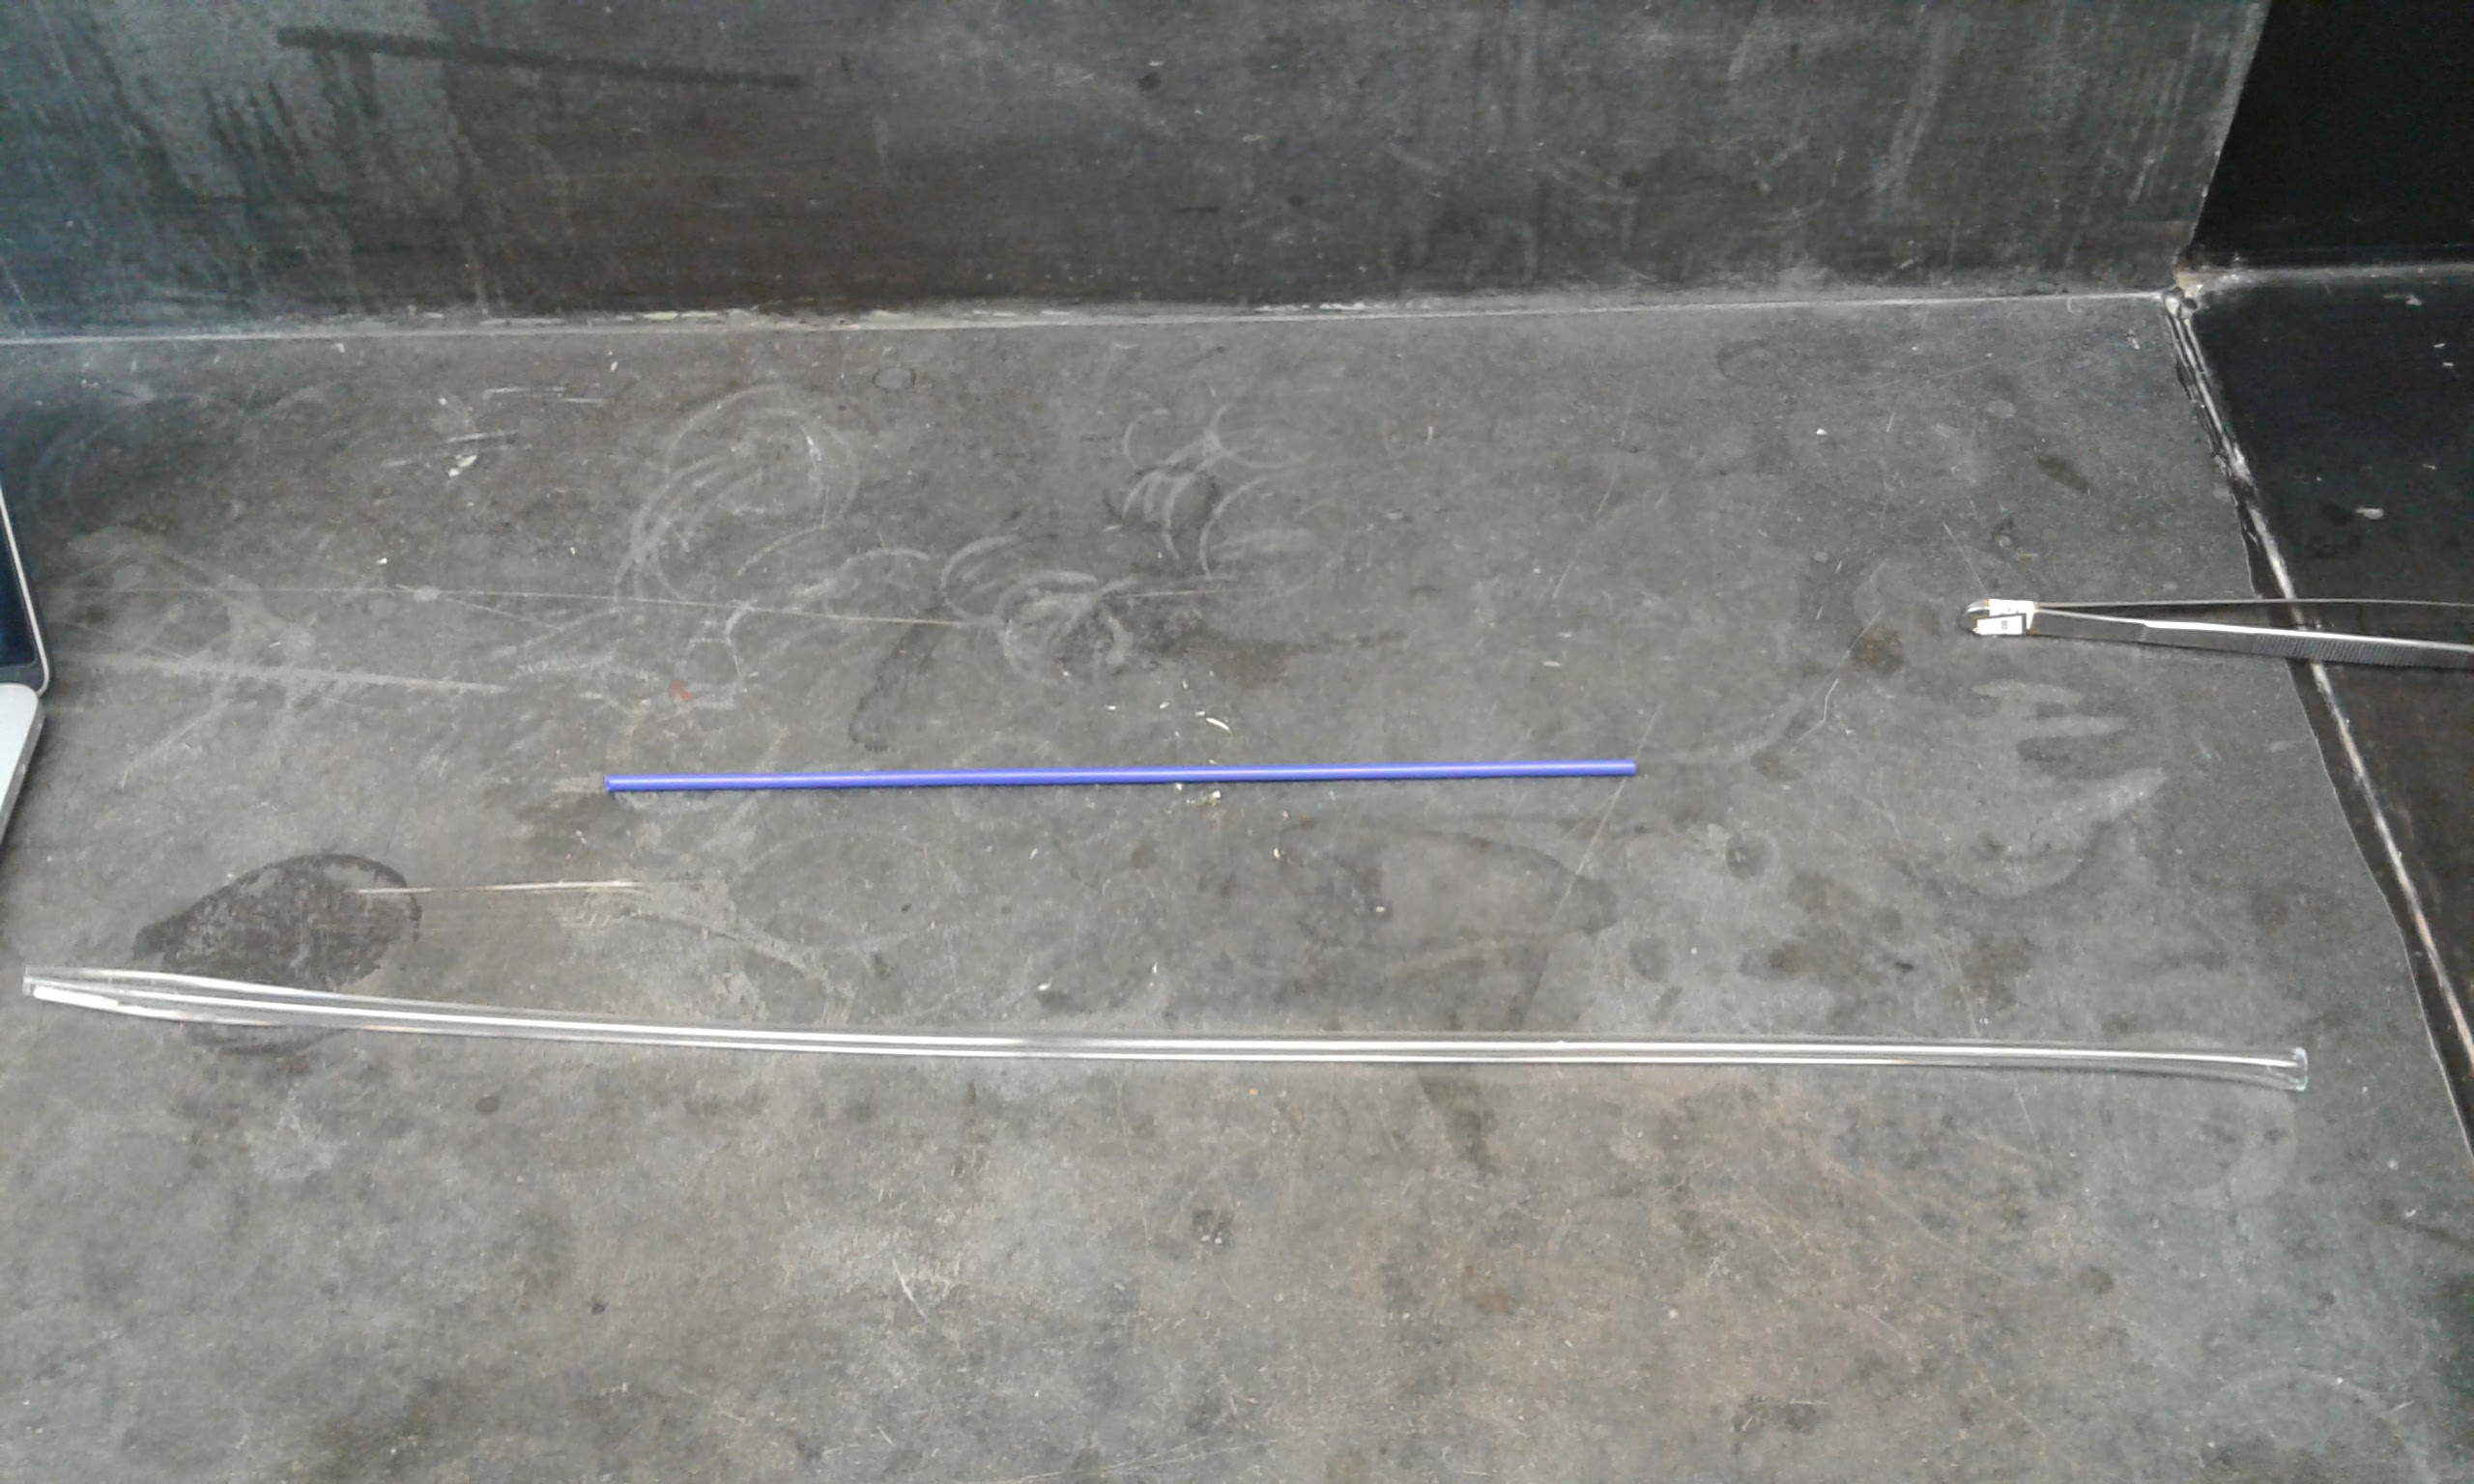
Solid blue and Anna's hollow clear canes before pulling
Iteration #1
Solid Blue Cane
Base temp: 23.5C
1:28pm - set furnace to heat to 600C
1:29pm - Joel heating furnace
1:30pm - 600C
- [AMDH] - this was pretty much the same as the first trial. I pulled the solid blue cane into thinner canes or 'stringers.' As I practiced it got easier to pull even canes. I was familiar with glass, but working in the furnace was unfamiliar because the heat is less focused than the heat of a lamp working flame, and the actions of pulling is different from the actions of winding glass onto a mandrel to make beads, which is what I have experience doing. Even after doing session #1 I was better able to control the area of the glass being affected by the heat, which made it a lot easier to pull the cane evenly. I pulled two thin stringers from the blue cane, and the second one was easier to pull than the first.
Iteration #2 - two people blue cane.
Caitlyn is going to pull while I hold the cane. We will see how we communicate.
1:38 - 638C
- [AMDH] Was a lot easier that I expected. I held the cane and Caitlyn held the glass with the pincers. It took a little while to adjust so we both had a solid grip. The plan was that I hold the cane still while she pulled the glass. It turned out that I had to keep moving the hot section of cane out of the furnace and the cold section into the furnace so it wouldn't get too hot and just melt apart. We had to talk to each other about it to coordinate the tension but after a few minutes we figured out how to respond to each other's movements so the glass pulled pretty easily.
Iteration #3 - Anna’s hollow cane 1 person.
- [AMDH] - Again, now that I've got the hang of it the motions are pretty easy and I can pull a pretty long cane pretty evenly. Anna's canes (she made us some hollow canes in the hotshop from the tanks at RISD or UrbanGlass. I'm not sure which but either way it's still soda-lime silica glass) What was more difficult with these hollow canes was snapping the glass on the end. The solid canes I had just been melting off, but since these ones (unlike the pipettes) are hollow all the way through I wanted to make sure that I kept them from being blocked like the a-p specifies. It was really hard to snap the end off. I wanted to just melt it off like I did to the solid ones, which is what I ended up doing because it seemed like what the glass wanted to do. Also I didn't have quite enough hands to grab the cutters and try to snap the glass off. Melting it off closed off the hollow core but then I snapped it off with wire cutters after I had turned the furnace off and the glass had cooled, and most of the tube was still hollow.
Iteration #4 - Anna’s hollow cane 2 people
- [AMDH] - it was much more difficult to pull the hollow cane straight with two people than it was with the solid cane because we were worried about getting it straight and worried about heating one side more than the other and having the cane collapse and become blocked. We managed to do it by talking to each other but the cane we ended up with is not thin. Or even, really. It was, however, much easier to snap the cold end of the cane (on the left of the furnace) when I could use one of my hands to do it. So to snap instead of melt you really need two people. It is too hard to snap with only one hand.
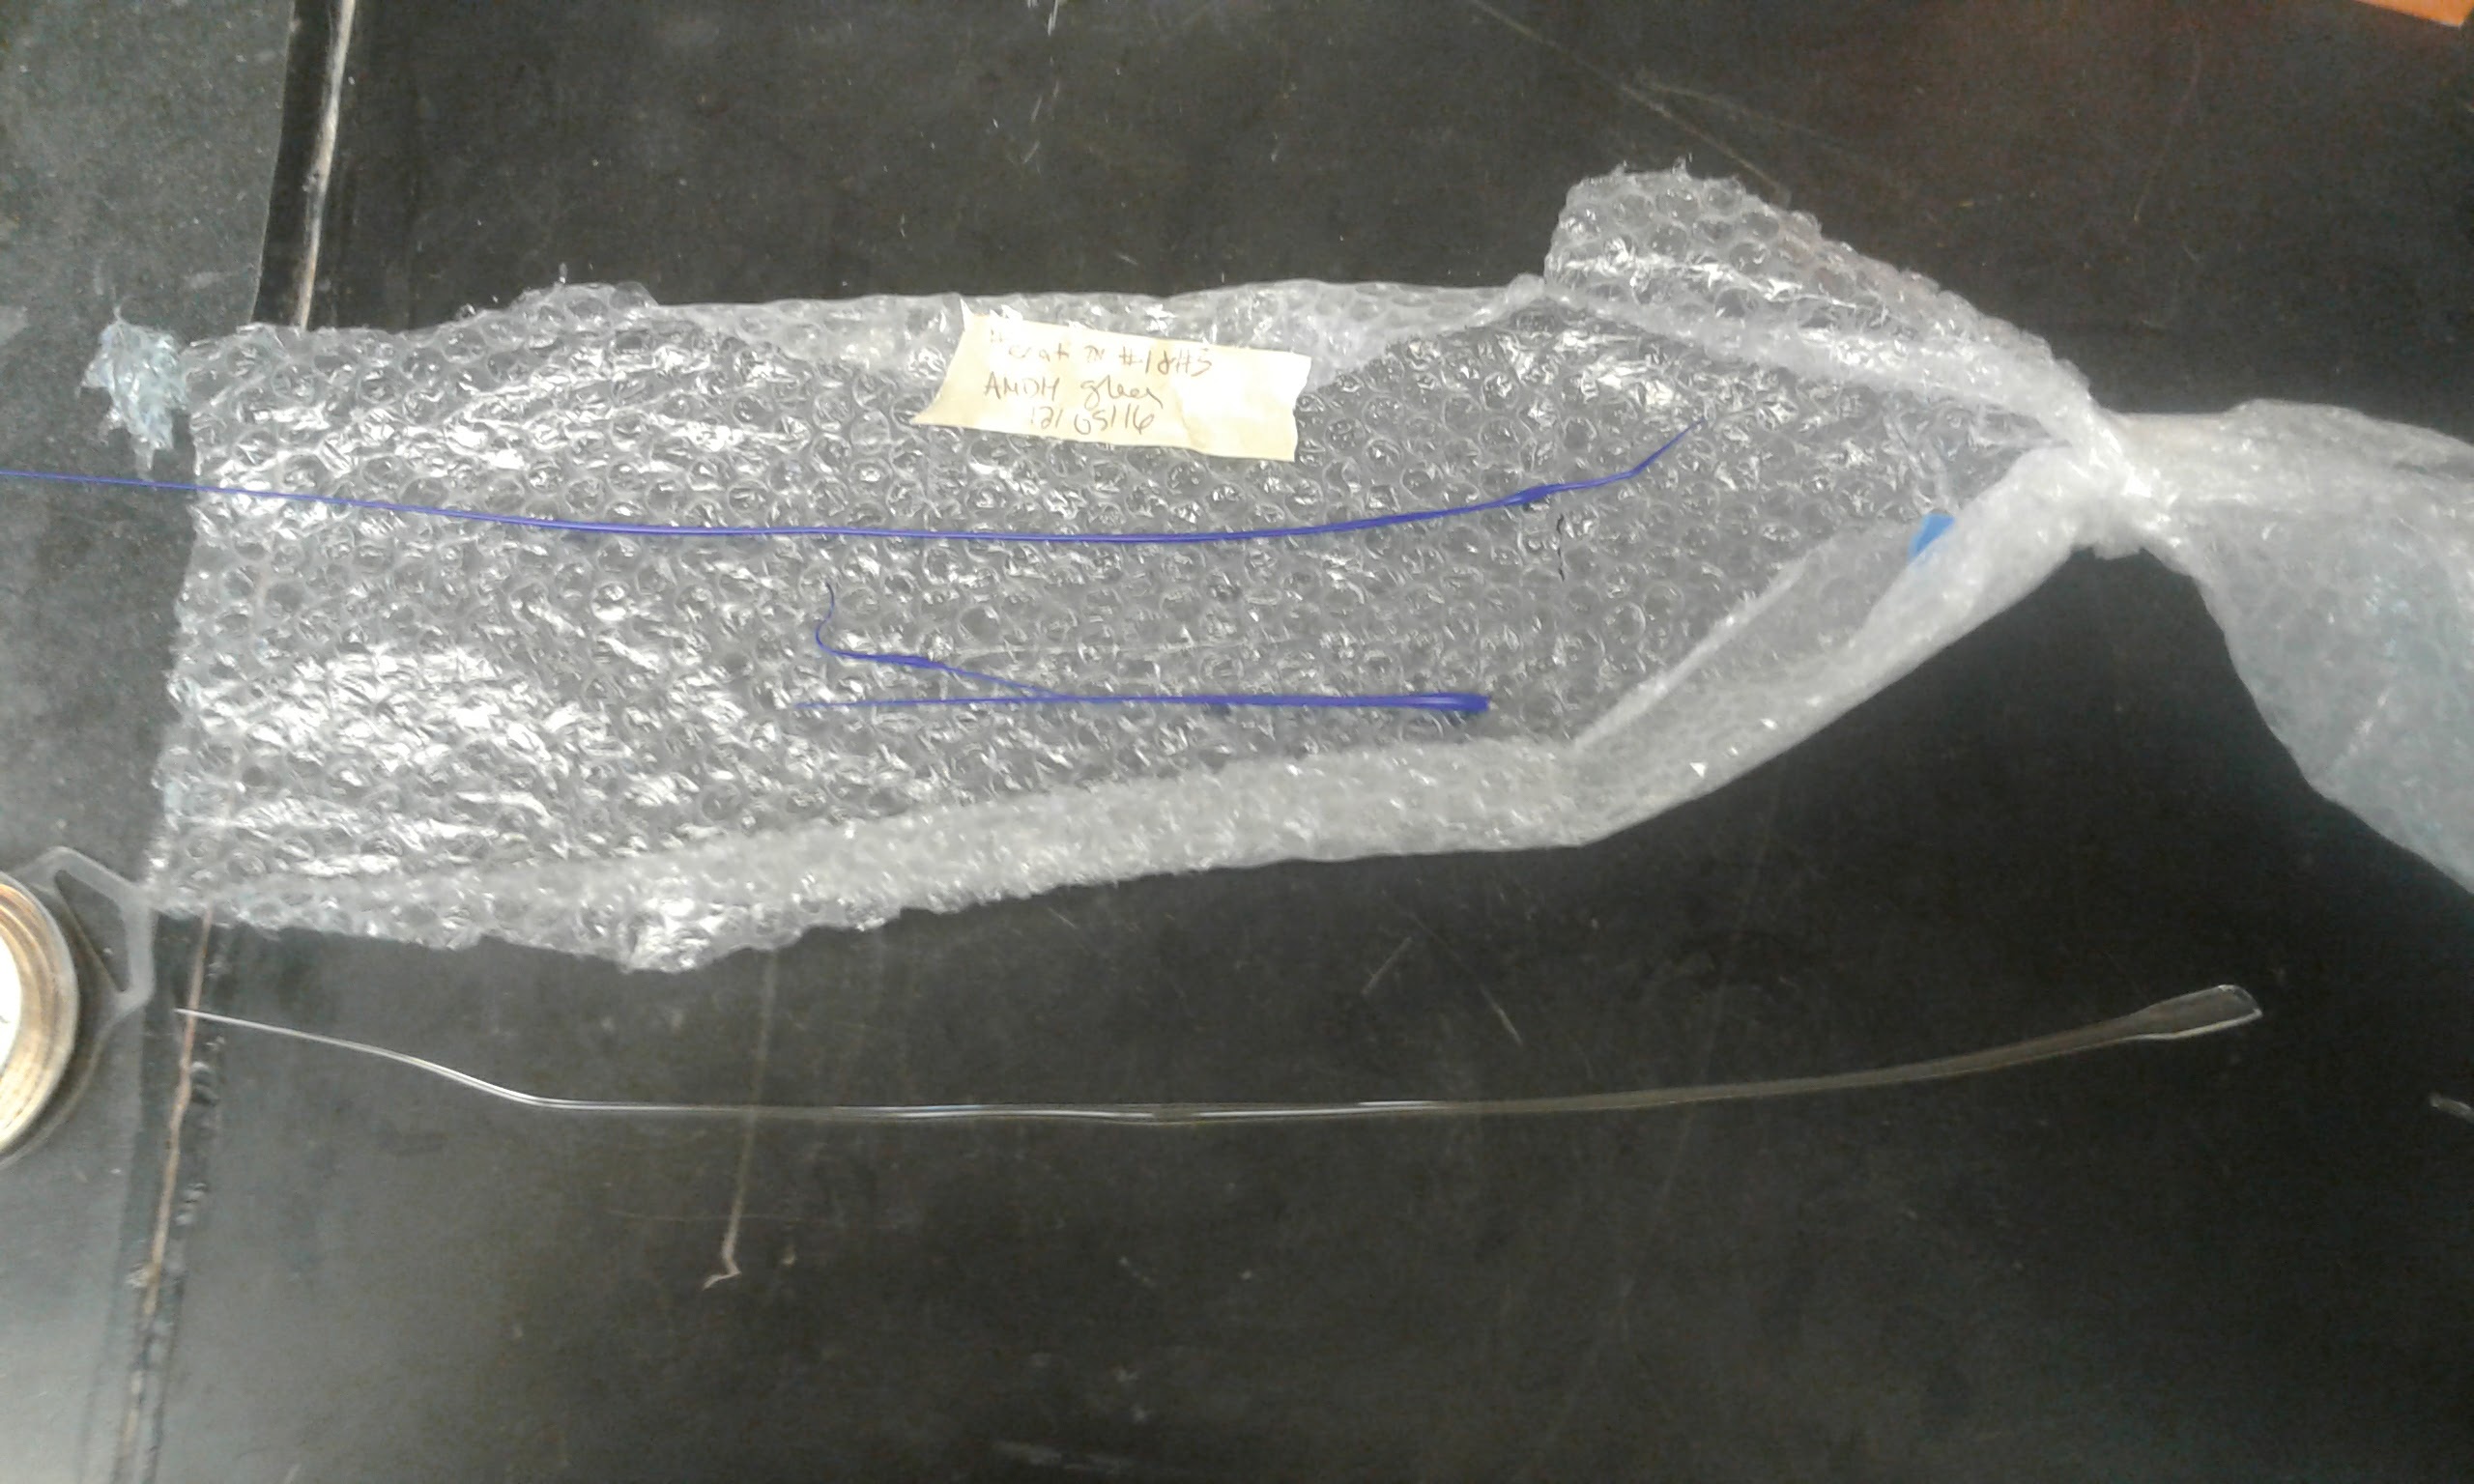
Canes from iterations 1 and 3.
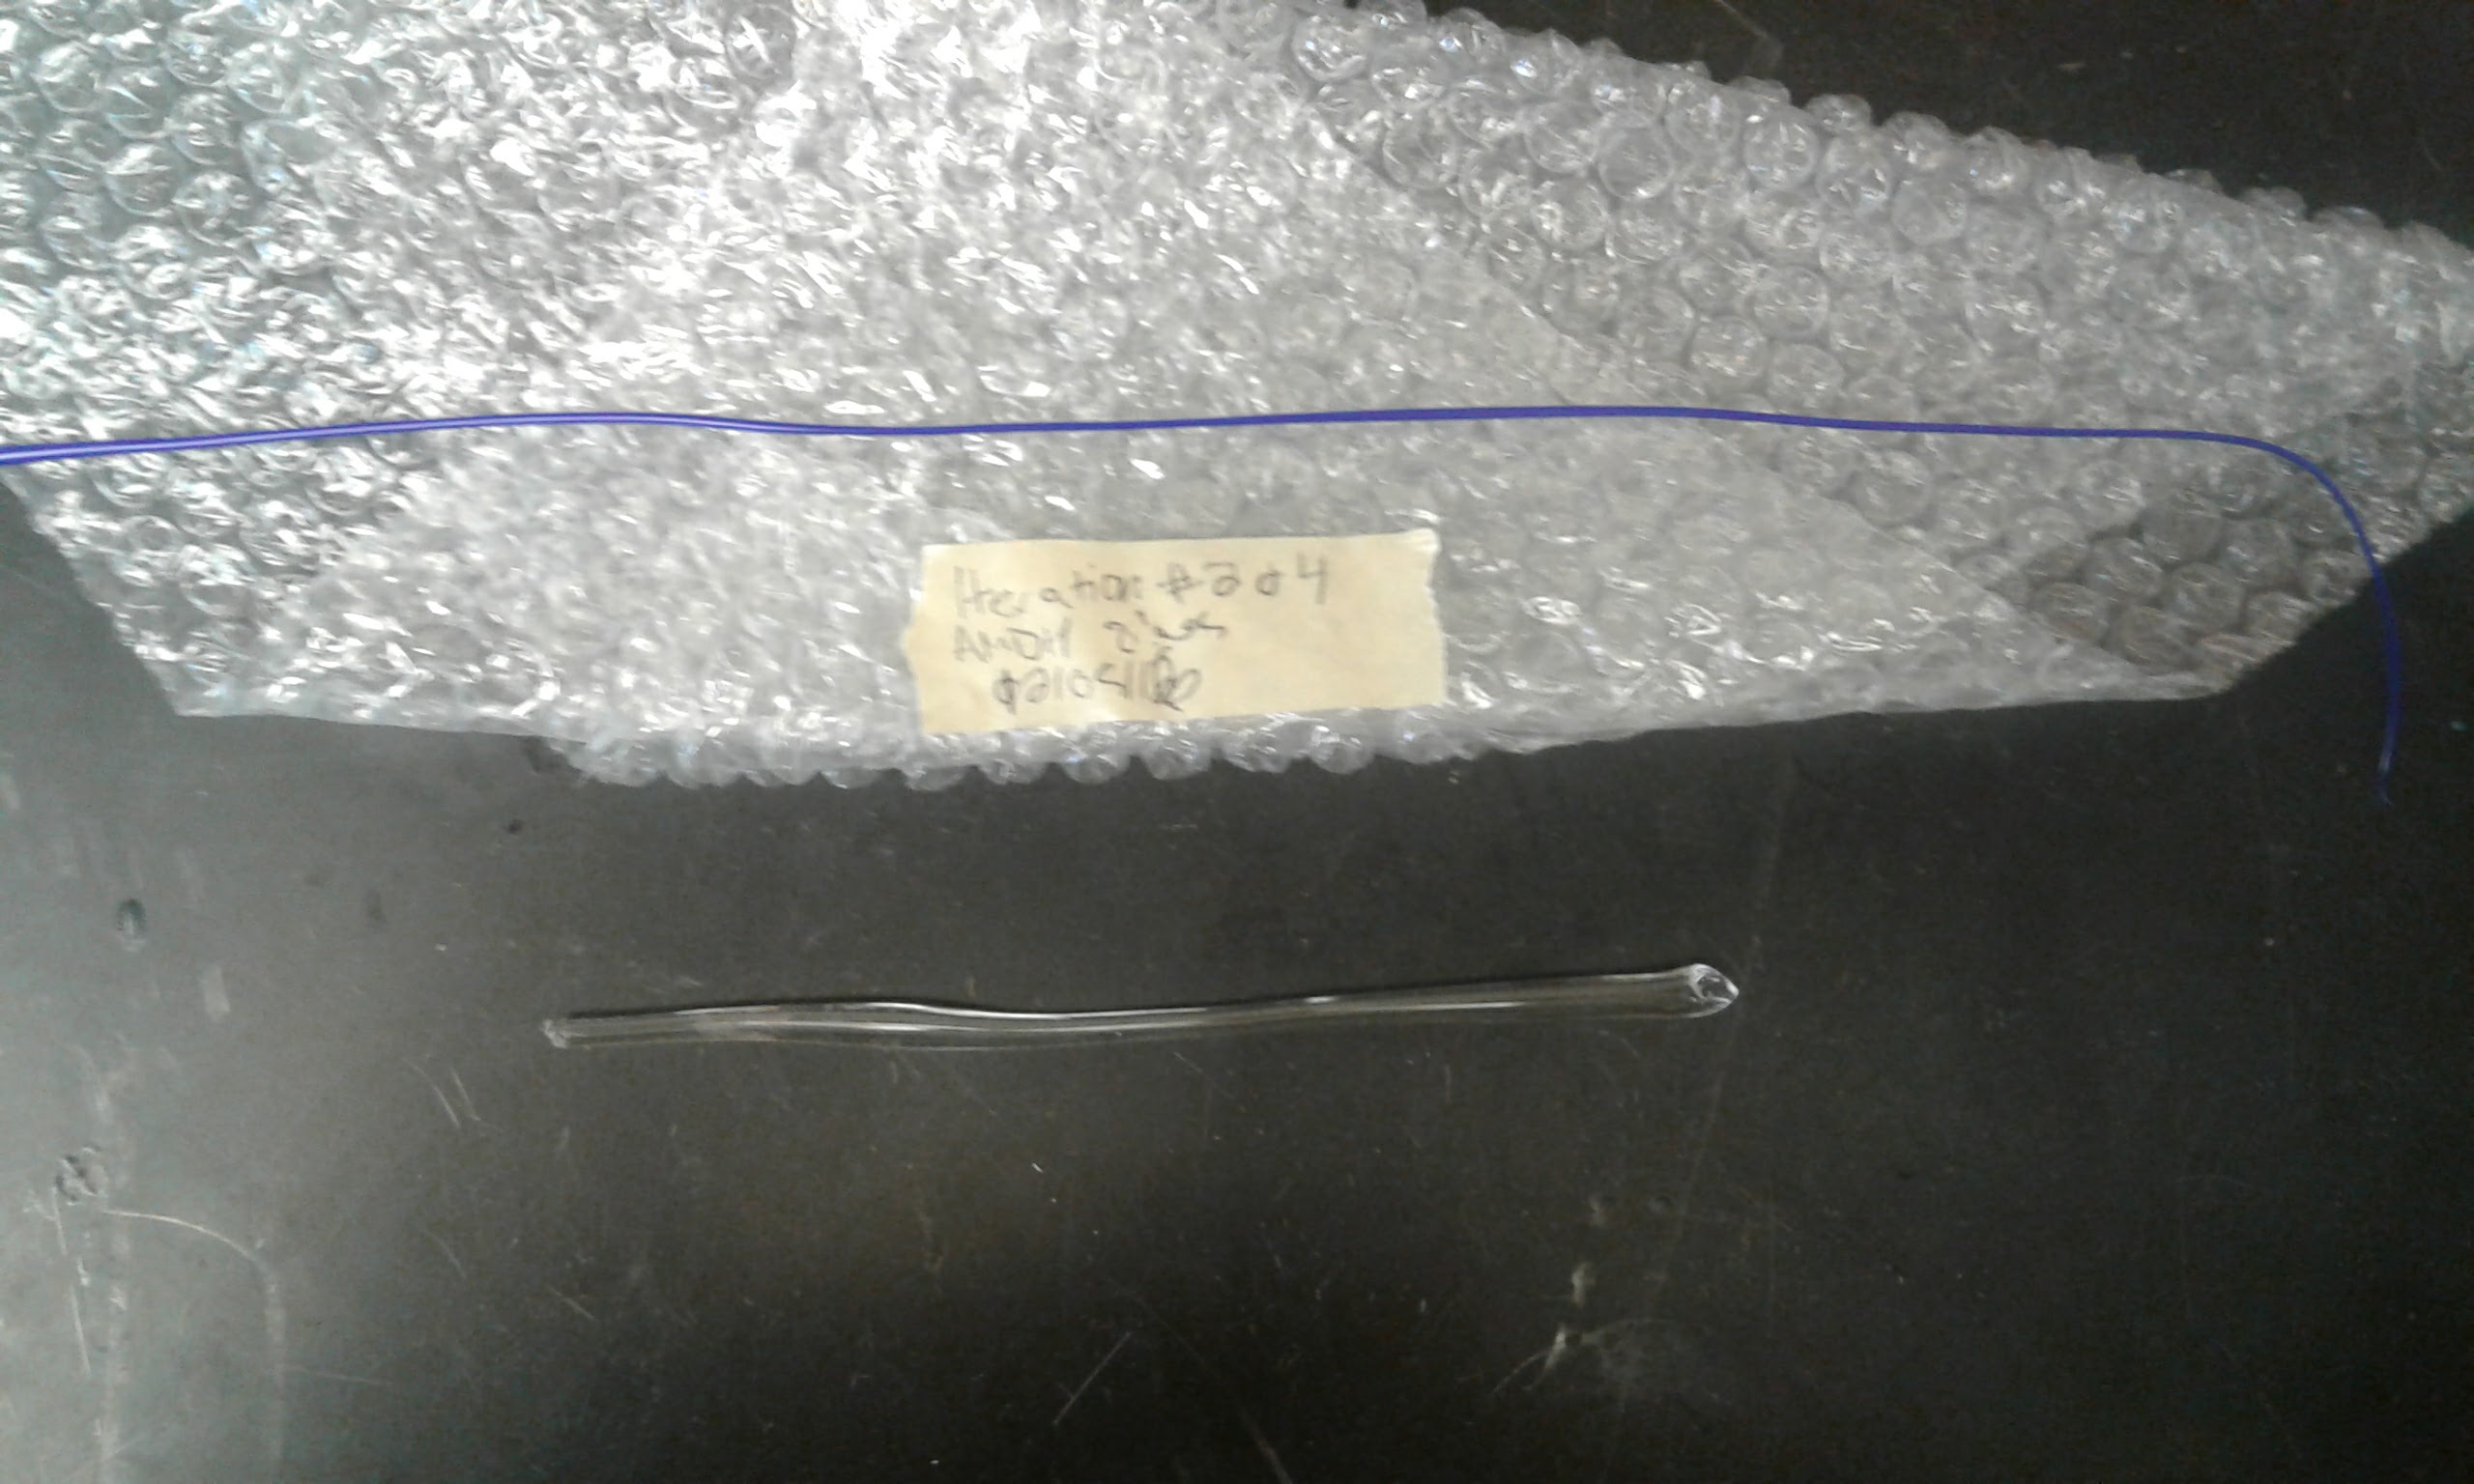
Canes from iterations 2 and 4.
Session #3
Place: Lab
Participants: Ana Matisse Donefer-Hickie
Date:
Workstation Setup:
- I will set up the blowtorch under the hood.
- Instead of using the furnace, this time I used the open flame (as the a-p suggests for molding the cane into the shape of a cage(?))
- I will have another person (Joel) hold the blow torch steady for me. He will wear gloves. OR I will use the furnace as a container to prop up the blowtorch so it will stay upright by itself.
- The flame will be pointed towards the back of the hood (mirroring a modern - and I expect early modern - lampworking set up)
- I will place the tray covered in firebrick to the right of the blow-torch set up so I can put my finished wire and cane on it to cool.
- Canes will be placed on the left for easy access.
I began by cutting six lengths of brass wire, one for each iteration and one extra.
Iteration #1 - Building (solid)
- I will hold the wire in my left hand and the cane in my right.
- I am using one of the samples from Trial 2 iteration #1 because I pulled it thin and he specifies the use of thin cane.
- I will heat both.
- I will try to lay the glass flat onto the wire and fuse them together in the heat of the lamp.
- At first it seemed like the glass stuck onto the wire. I laid quite a lot of glass onto the wire, about 6 inches of length. When it hit the wire the flame turned from blue to orange. In the flame the wire turned blue and gave off some gas. The glass would only go onto the wire when it glowed orange. I bent the wire with the glass on it and it was fairly easy to bend but not as easy as it was to bend the wire under heat without glass. It was like butter to bend wire in the heat. The glass ultimately did not actually stick to the wire when I took it out of the heat. Part of it broke off halfway through and fell into my furnace (which was being used to hold up the torch). I played with the rest for bit to see if I could get it to stick to the wire but it did not even when I squished it against the wire with my pincers. I ended up wrapping it around the wire and that is the only way I could get it to stick. The little bits of glass that fell of the wire don’t look any different (they are still blue) but the wire has turned blue where it was in the heat.
- Do they fuse? Does the wire/glass combo bend? - they bent together when very hot but ultimately did not fuse.
Iteration #2 - Building (hollow) SKIPPED Instead BRASS
- Same as #1 using hollow cane.
- I am going to use the hollow cane from Trial 2 iteration # 3.
- I have decided to skip this iteration and the next and movie right onto lamp-winding the hollow cane because the solid cane did not stick to the wire and he does not actually mention solid cane (only hollow). I think iteration 2 and 3 are actually unnecessary, given that he specifically talks about hollow cane and the solid cane did not stick to the wire anyway. Skipping right to iteration #4.
- We decided to do some wire trials to see if the glass will stick to other kinds of wire. We have iron, copper, and galvanised steel wires.
- MATERIAL TRIALS (wire) (Will glass stick to any of these wires? Will the glass + wire mixture bend together)
- Using The hollow cane from Session 2 iteration # 3 (donated by Anna Riley).
- Iteration #2 Brass
- We decided to switch to the clear hollow cane so we have to do the brass again as a control.
- It stuck this time. I had to get the metal so hot that it was glowing orange, but then I was able to fuse glass to the wire. I was also able to bend it by getting the glass very very hot in the middle and turning the wire on either side. So far no glass has fallen off this brass wire.
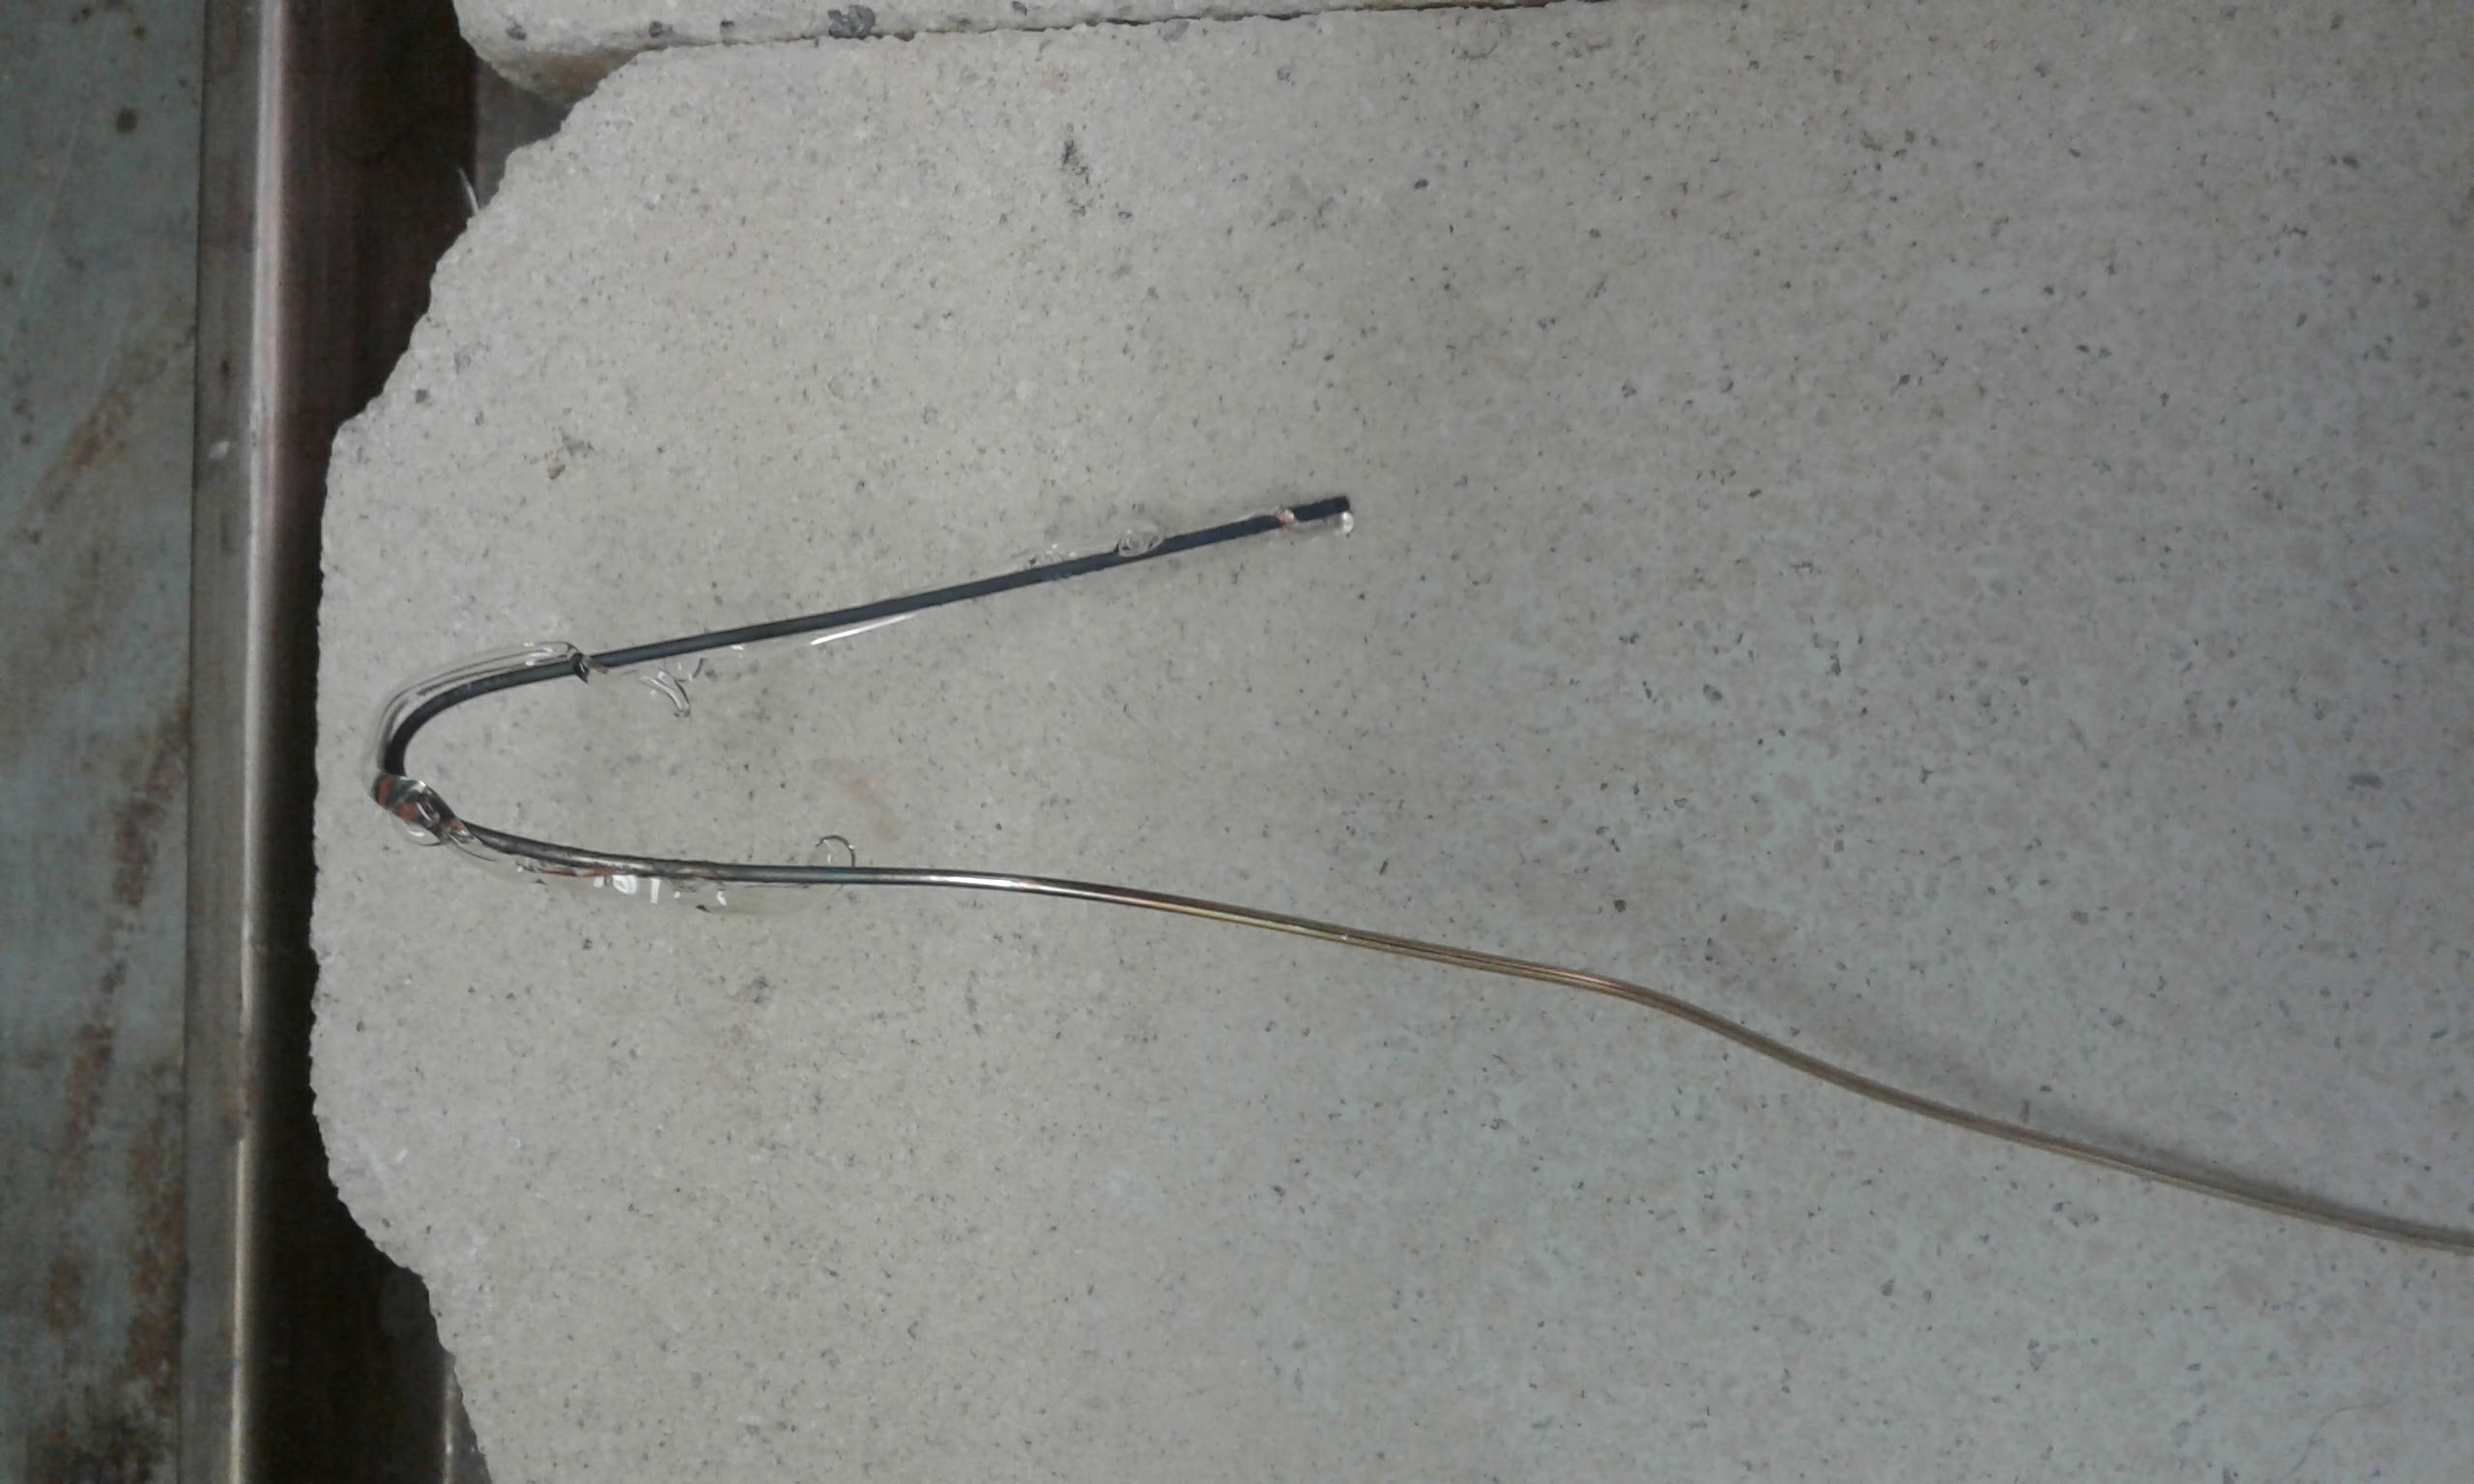
Glass built on brass.
Iteration #3 Iron (nail)
- It was with this trial that I really noticed that the metal had to be glowing red hot in order for the glass to stick. I did not try to bend this one because my iron nail was too thick and short for bending it to be practical. After I left it to cool for about 5min, however, some of the glass popped off of the nail in one piece. This is likely because the metal and the glass were cooling at different rates (thermal shock).
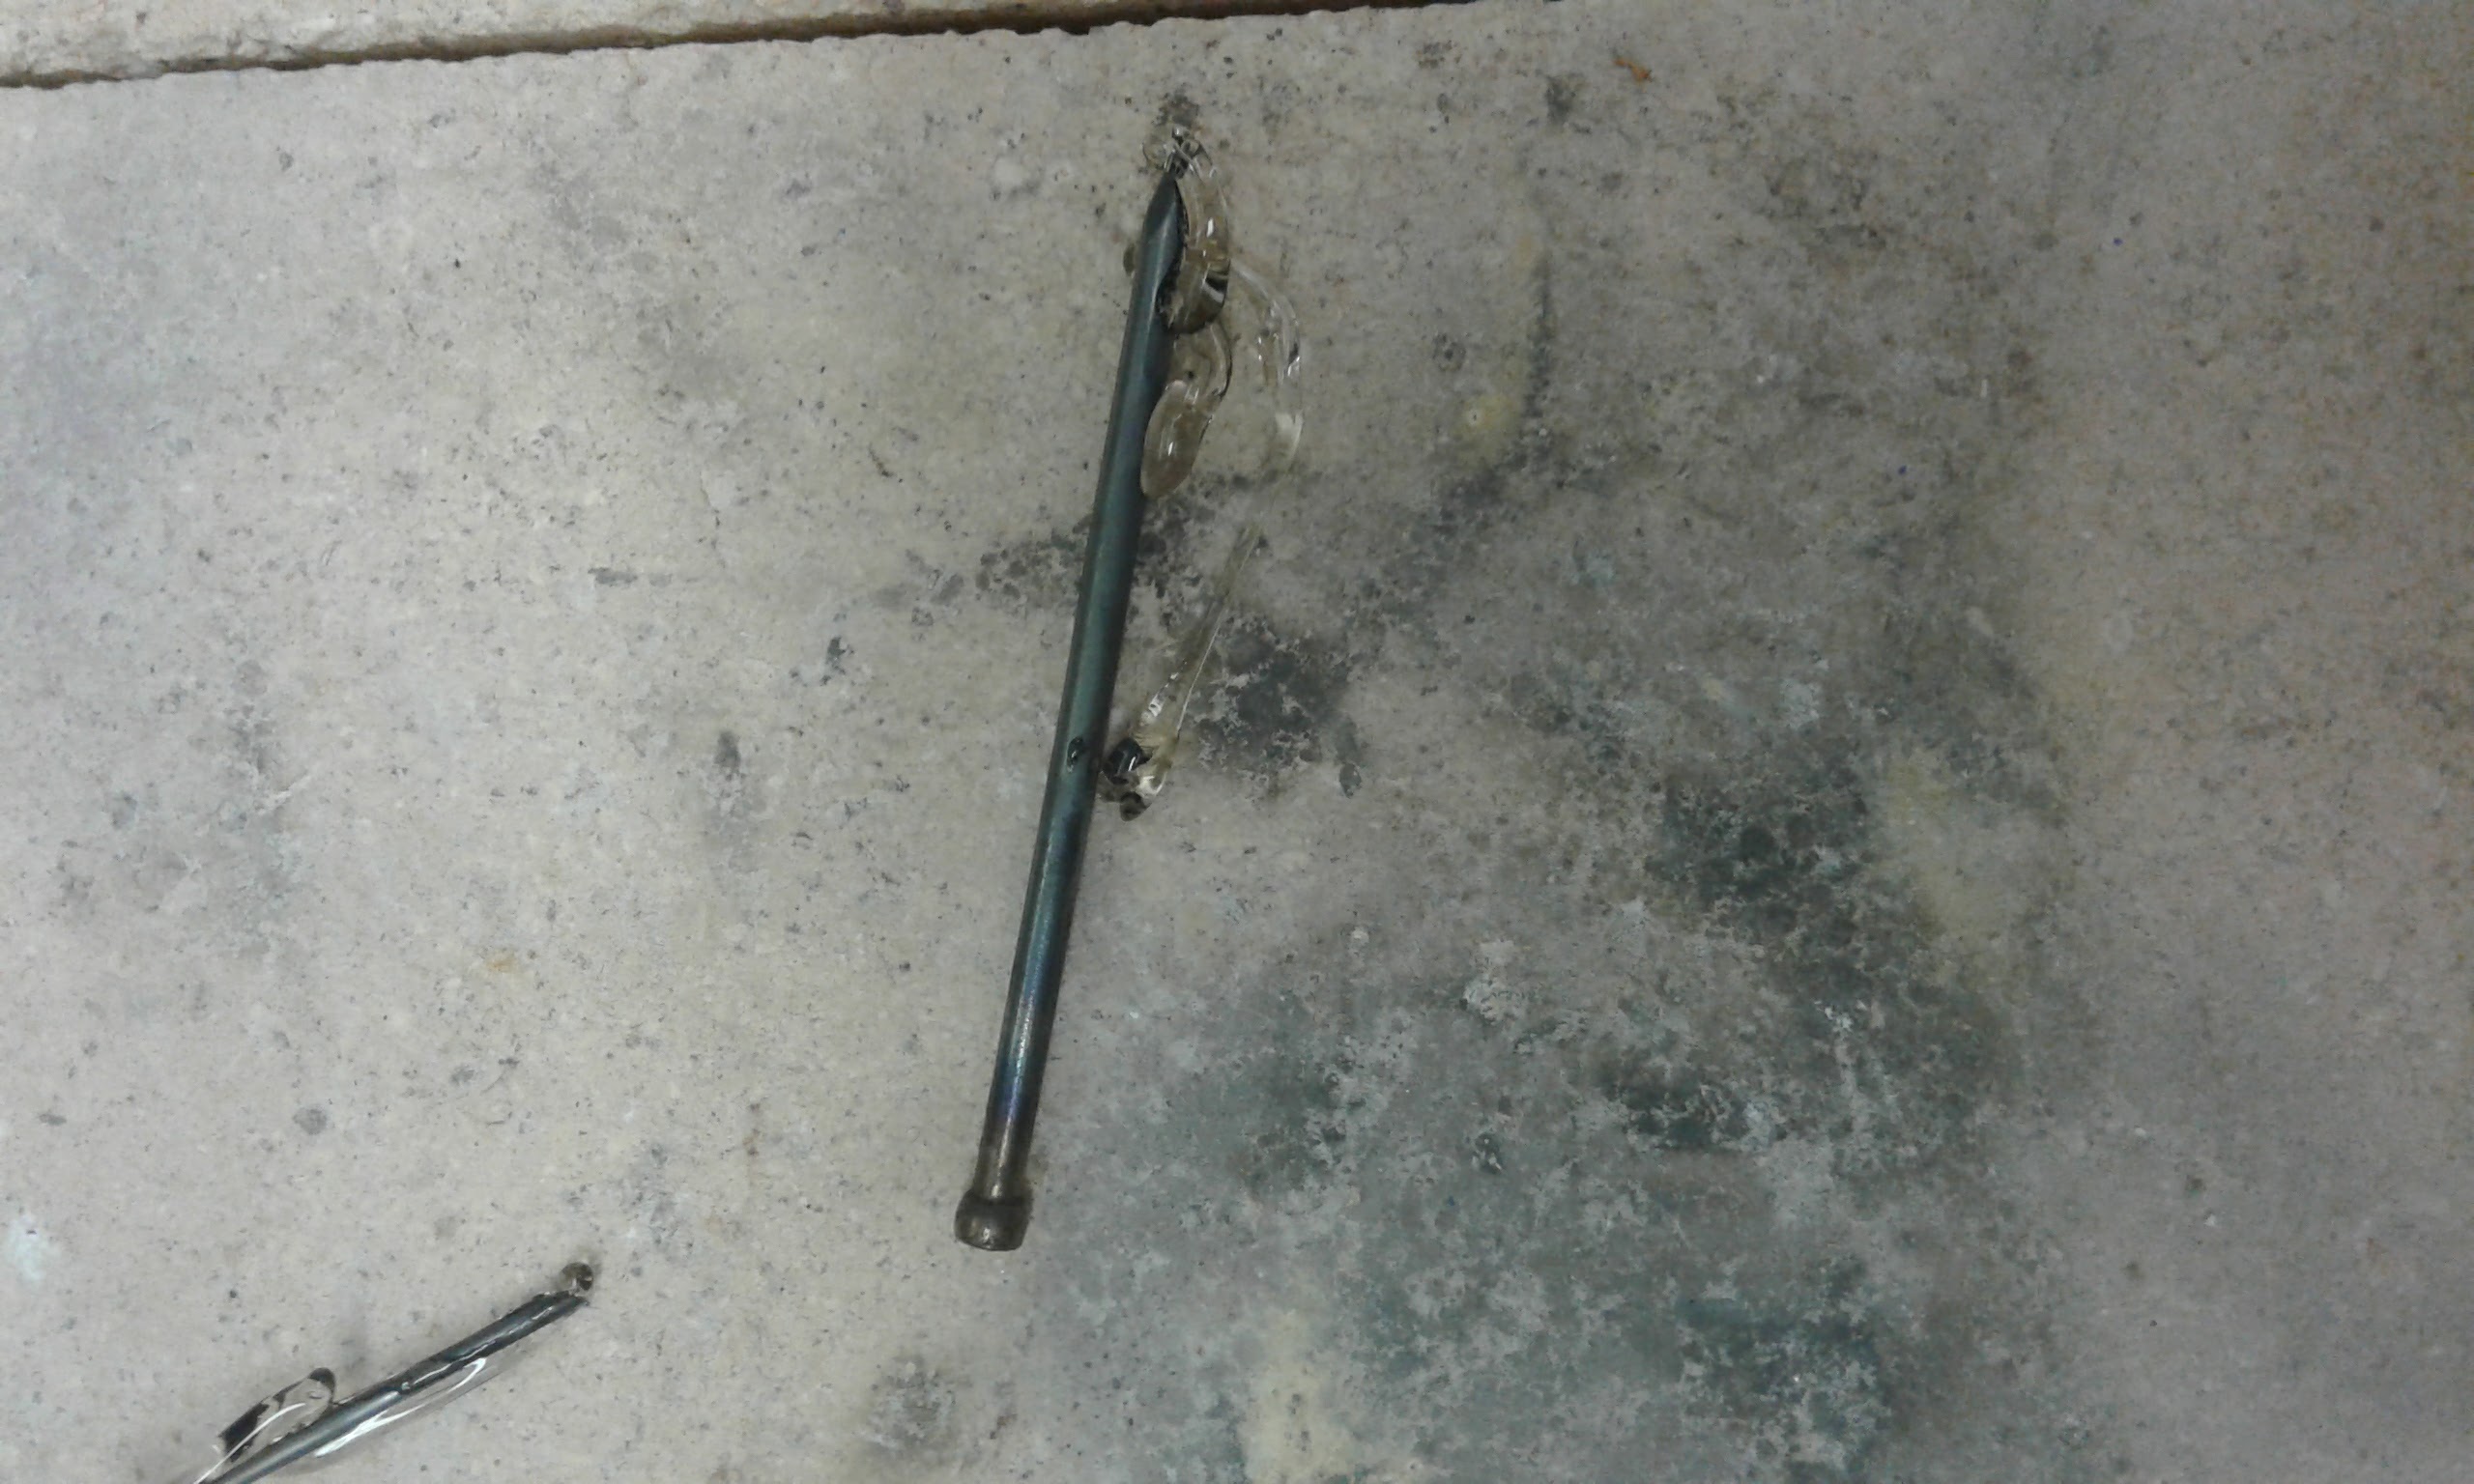
Glass built on nail.
Iteration #4 Copper (copper staple)
- The glass stuck really well to the copper staple when they were in the heat. This one I was also able to bend by heating the metal until it glowed and the glass glowed as well and then bending it with the tweezers on either side of the hot section. Once it cooled some glass has come off of it, but some is still stuck to it.
- While I was wrapping it up, some glass snapped off of this one. I don’t think it’s stuck very well.
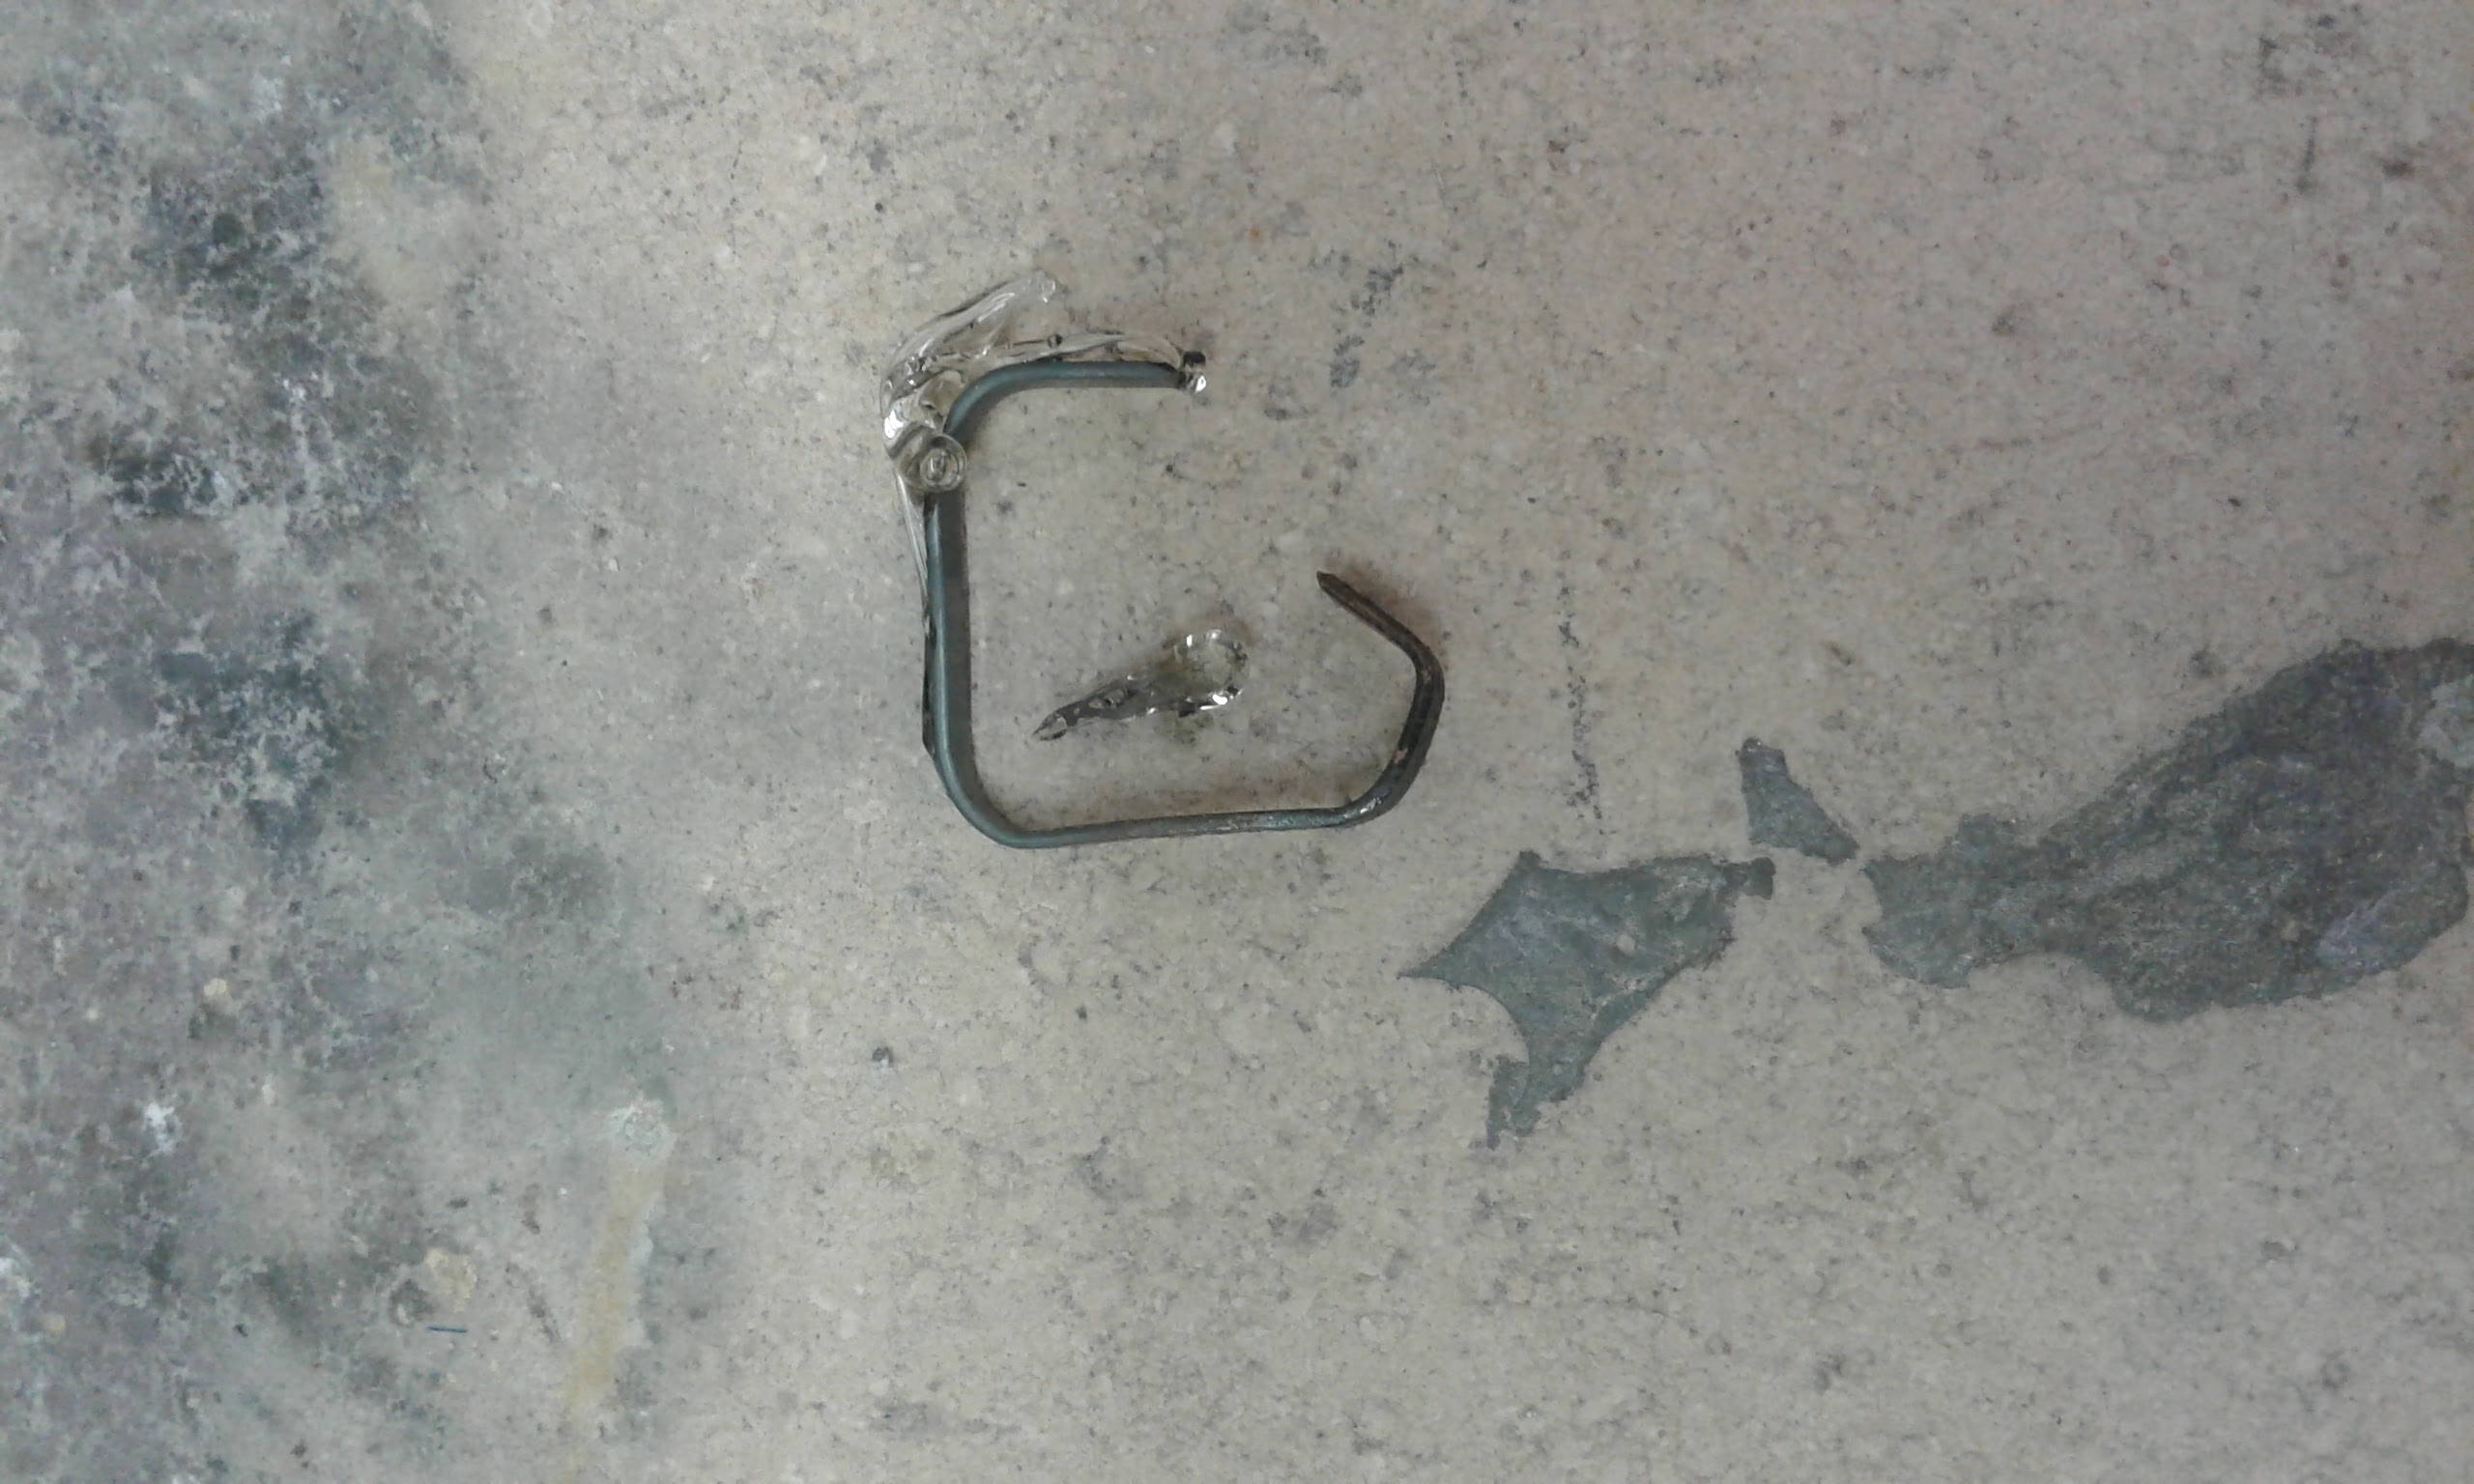
Glass built on copper.
Iteration #5 Galvanized Steel (paperclip)
- The glass stuck really well to this one too. By this time I was also ‘getting the hang of it’ and it was easier to manipulate the material. The hand in the glove, however, was starting to cramp and I had to re-adjust the pincers several times to maintain my grip.
- This one was awkward to manipulate because I was holding it in the pincers but the wire was really long and difficult to control with my crampy hand.
- So far no glass has fallen off this one either and it has maintained its bent shape.
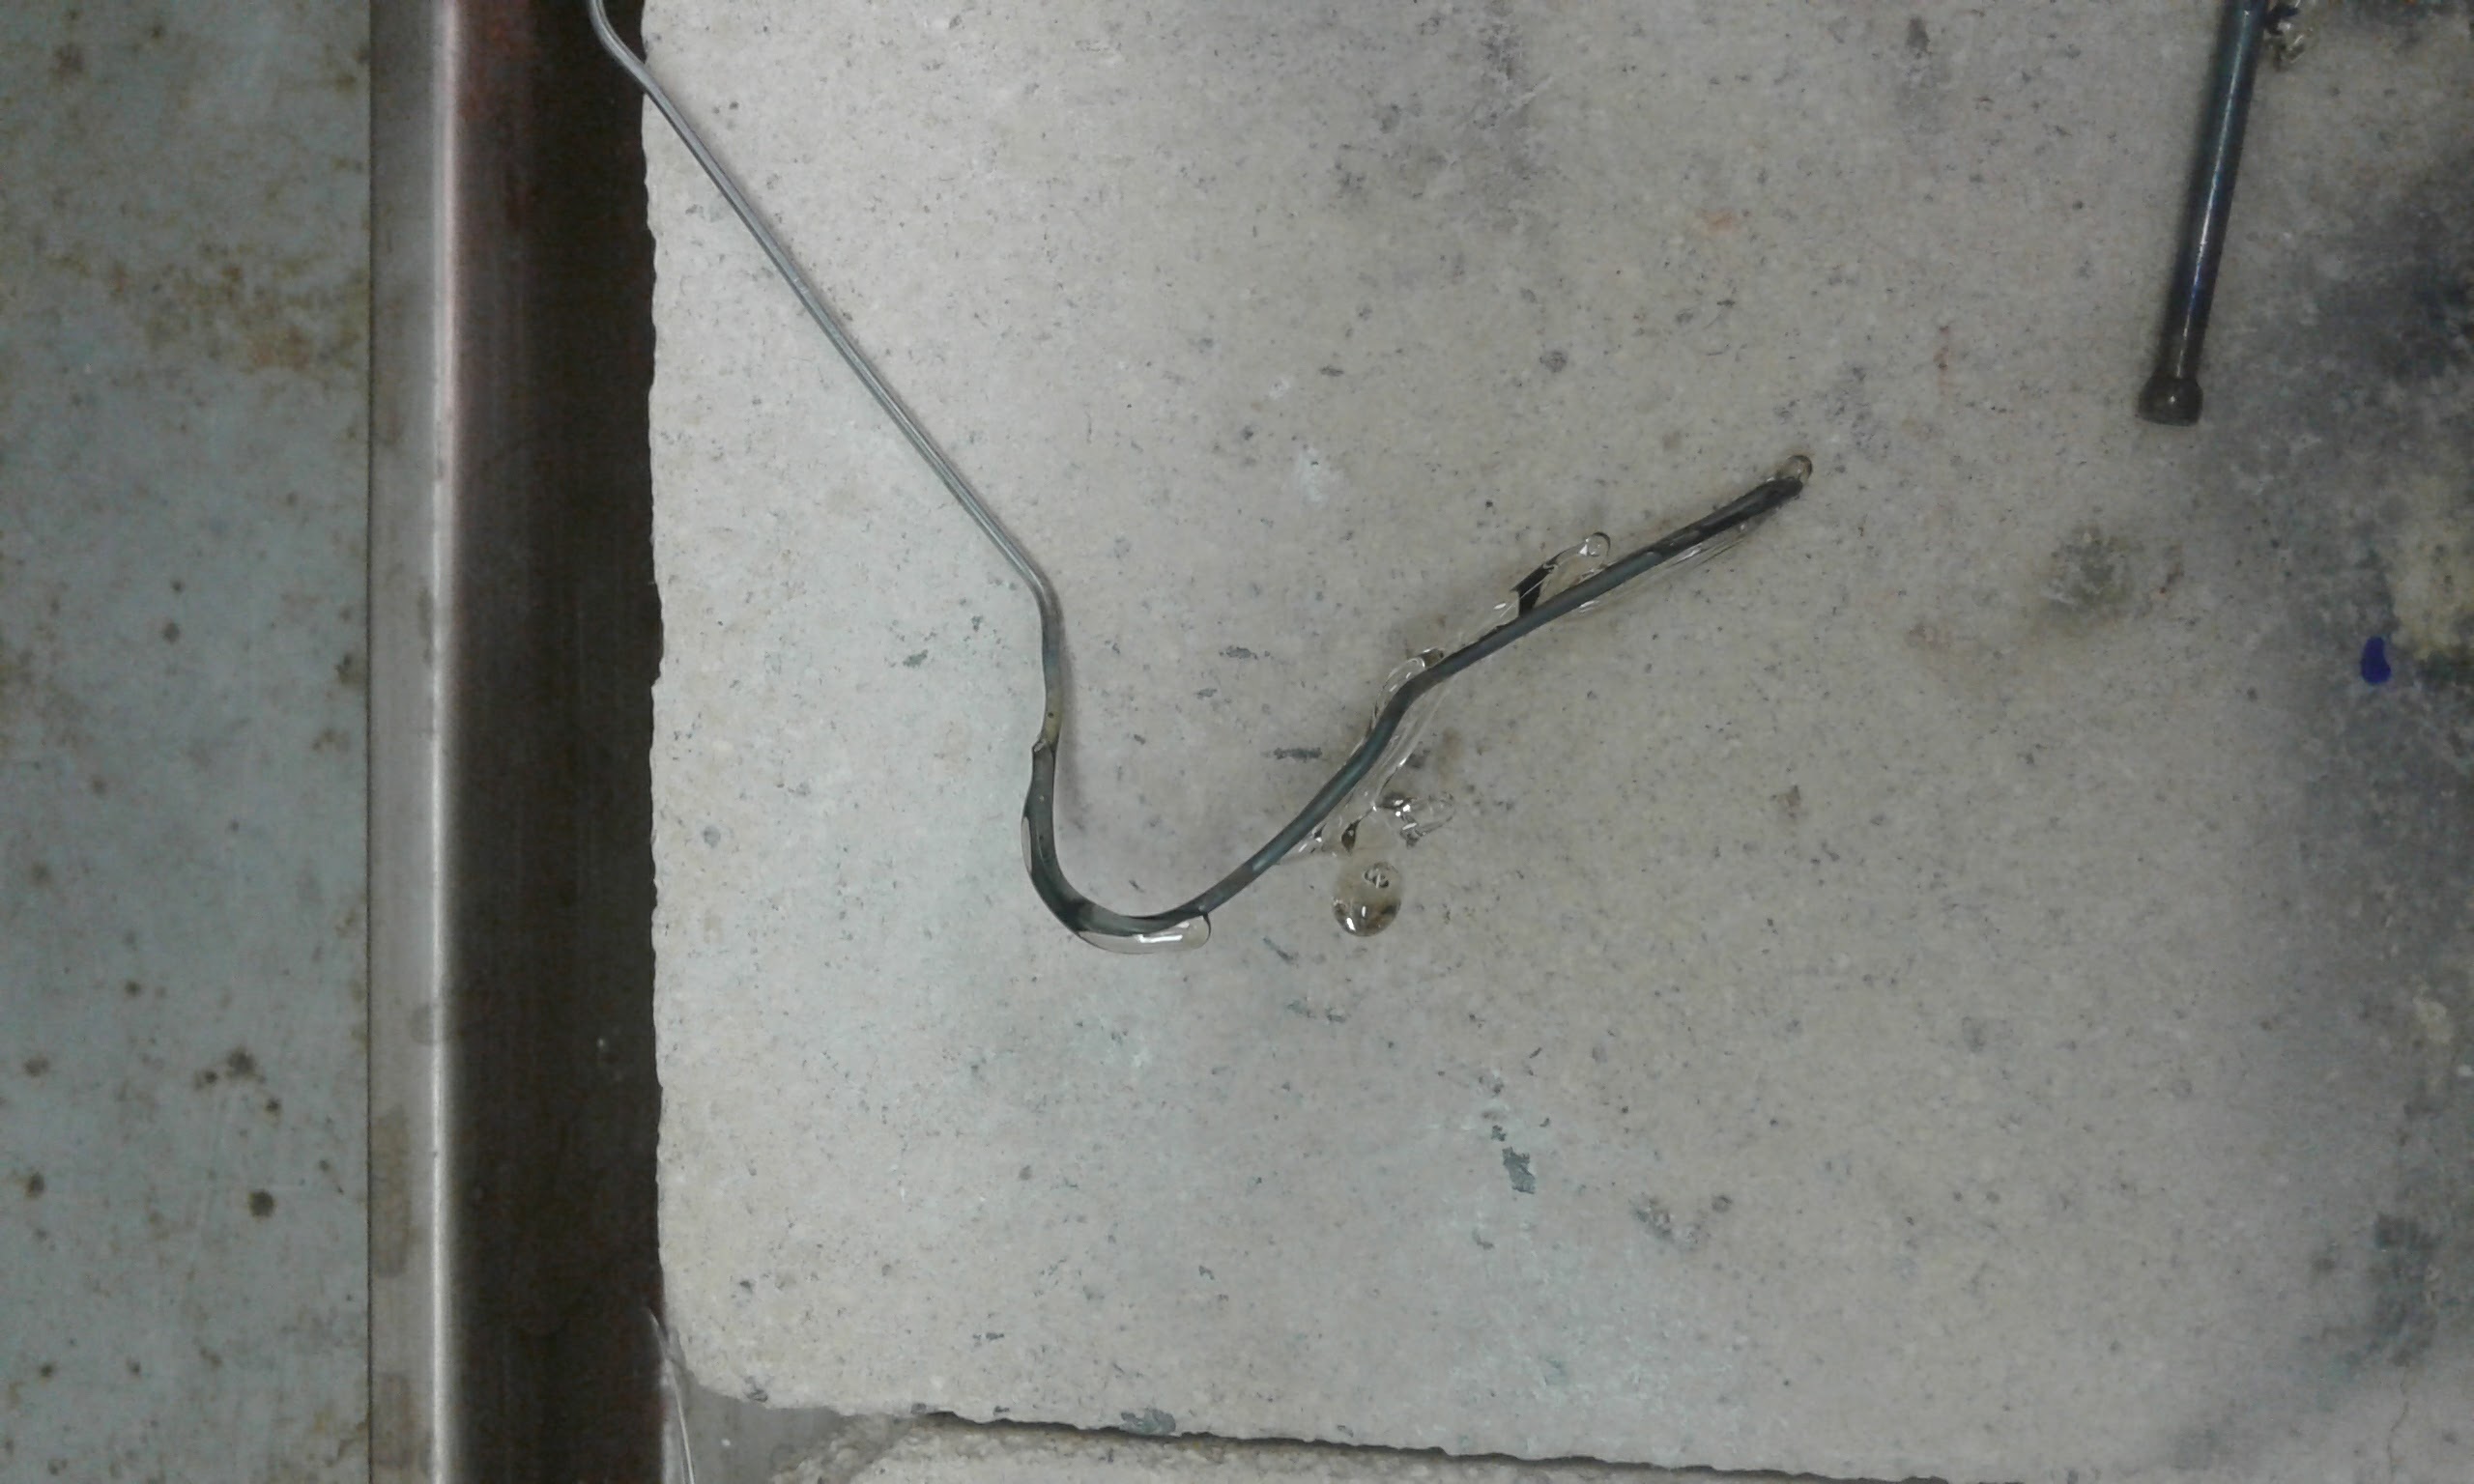
Glass built on galvanized steel.
Session #3
Place: Lab
Participants: Ana Matisse Donefer-Hickie
Date: 12/09/16
Workstation Setup:
- Same as Session #4
Iteration #1 - Lamp-wound
- I will hold the wire in my left hand and the cane in my right.
- I will heat the glass until it is soft in the flame.
- I will also heat the wire until it glows.
- I will wind the glass around the wire along its length in a spiral.
- [AMDH] - Notes:
- I had to do a really small area at a time because the wire kept getting very hot and melting off into pieces. There is a really fine line between getting the wire hot enough to melt glass onto it and getting it too hot and having it break. This would probably be made easier if I were using iron wire or even thicker brass or latten wire. An exploration of wire in the manuscript would probably be helpful for me if I were to try this again. The flame wasn’t really hot enough to get the glass really really soft, it remained malleable but pretty hard. I did manage to get the cane to wrap all the way around the wire like a bead. It would, I think, be impossible to remove it without relief though. The key to getting the glass to stick to the wire is to get the wire very very hot. I don’t see how a cage could maintain its shape if he used this method on a cage that was already assembled. It would have to be done on a wire which was then shaped into a house. It would be possible to add glass but it would be very difficult I think because it’s so difficult to get the heat right between the wire and the glass.
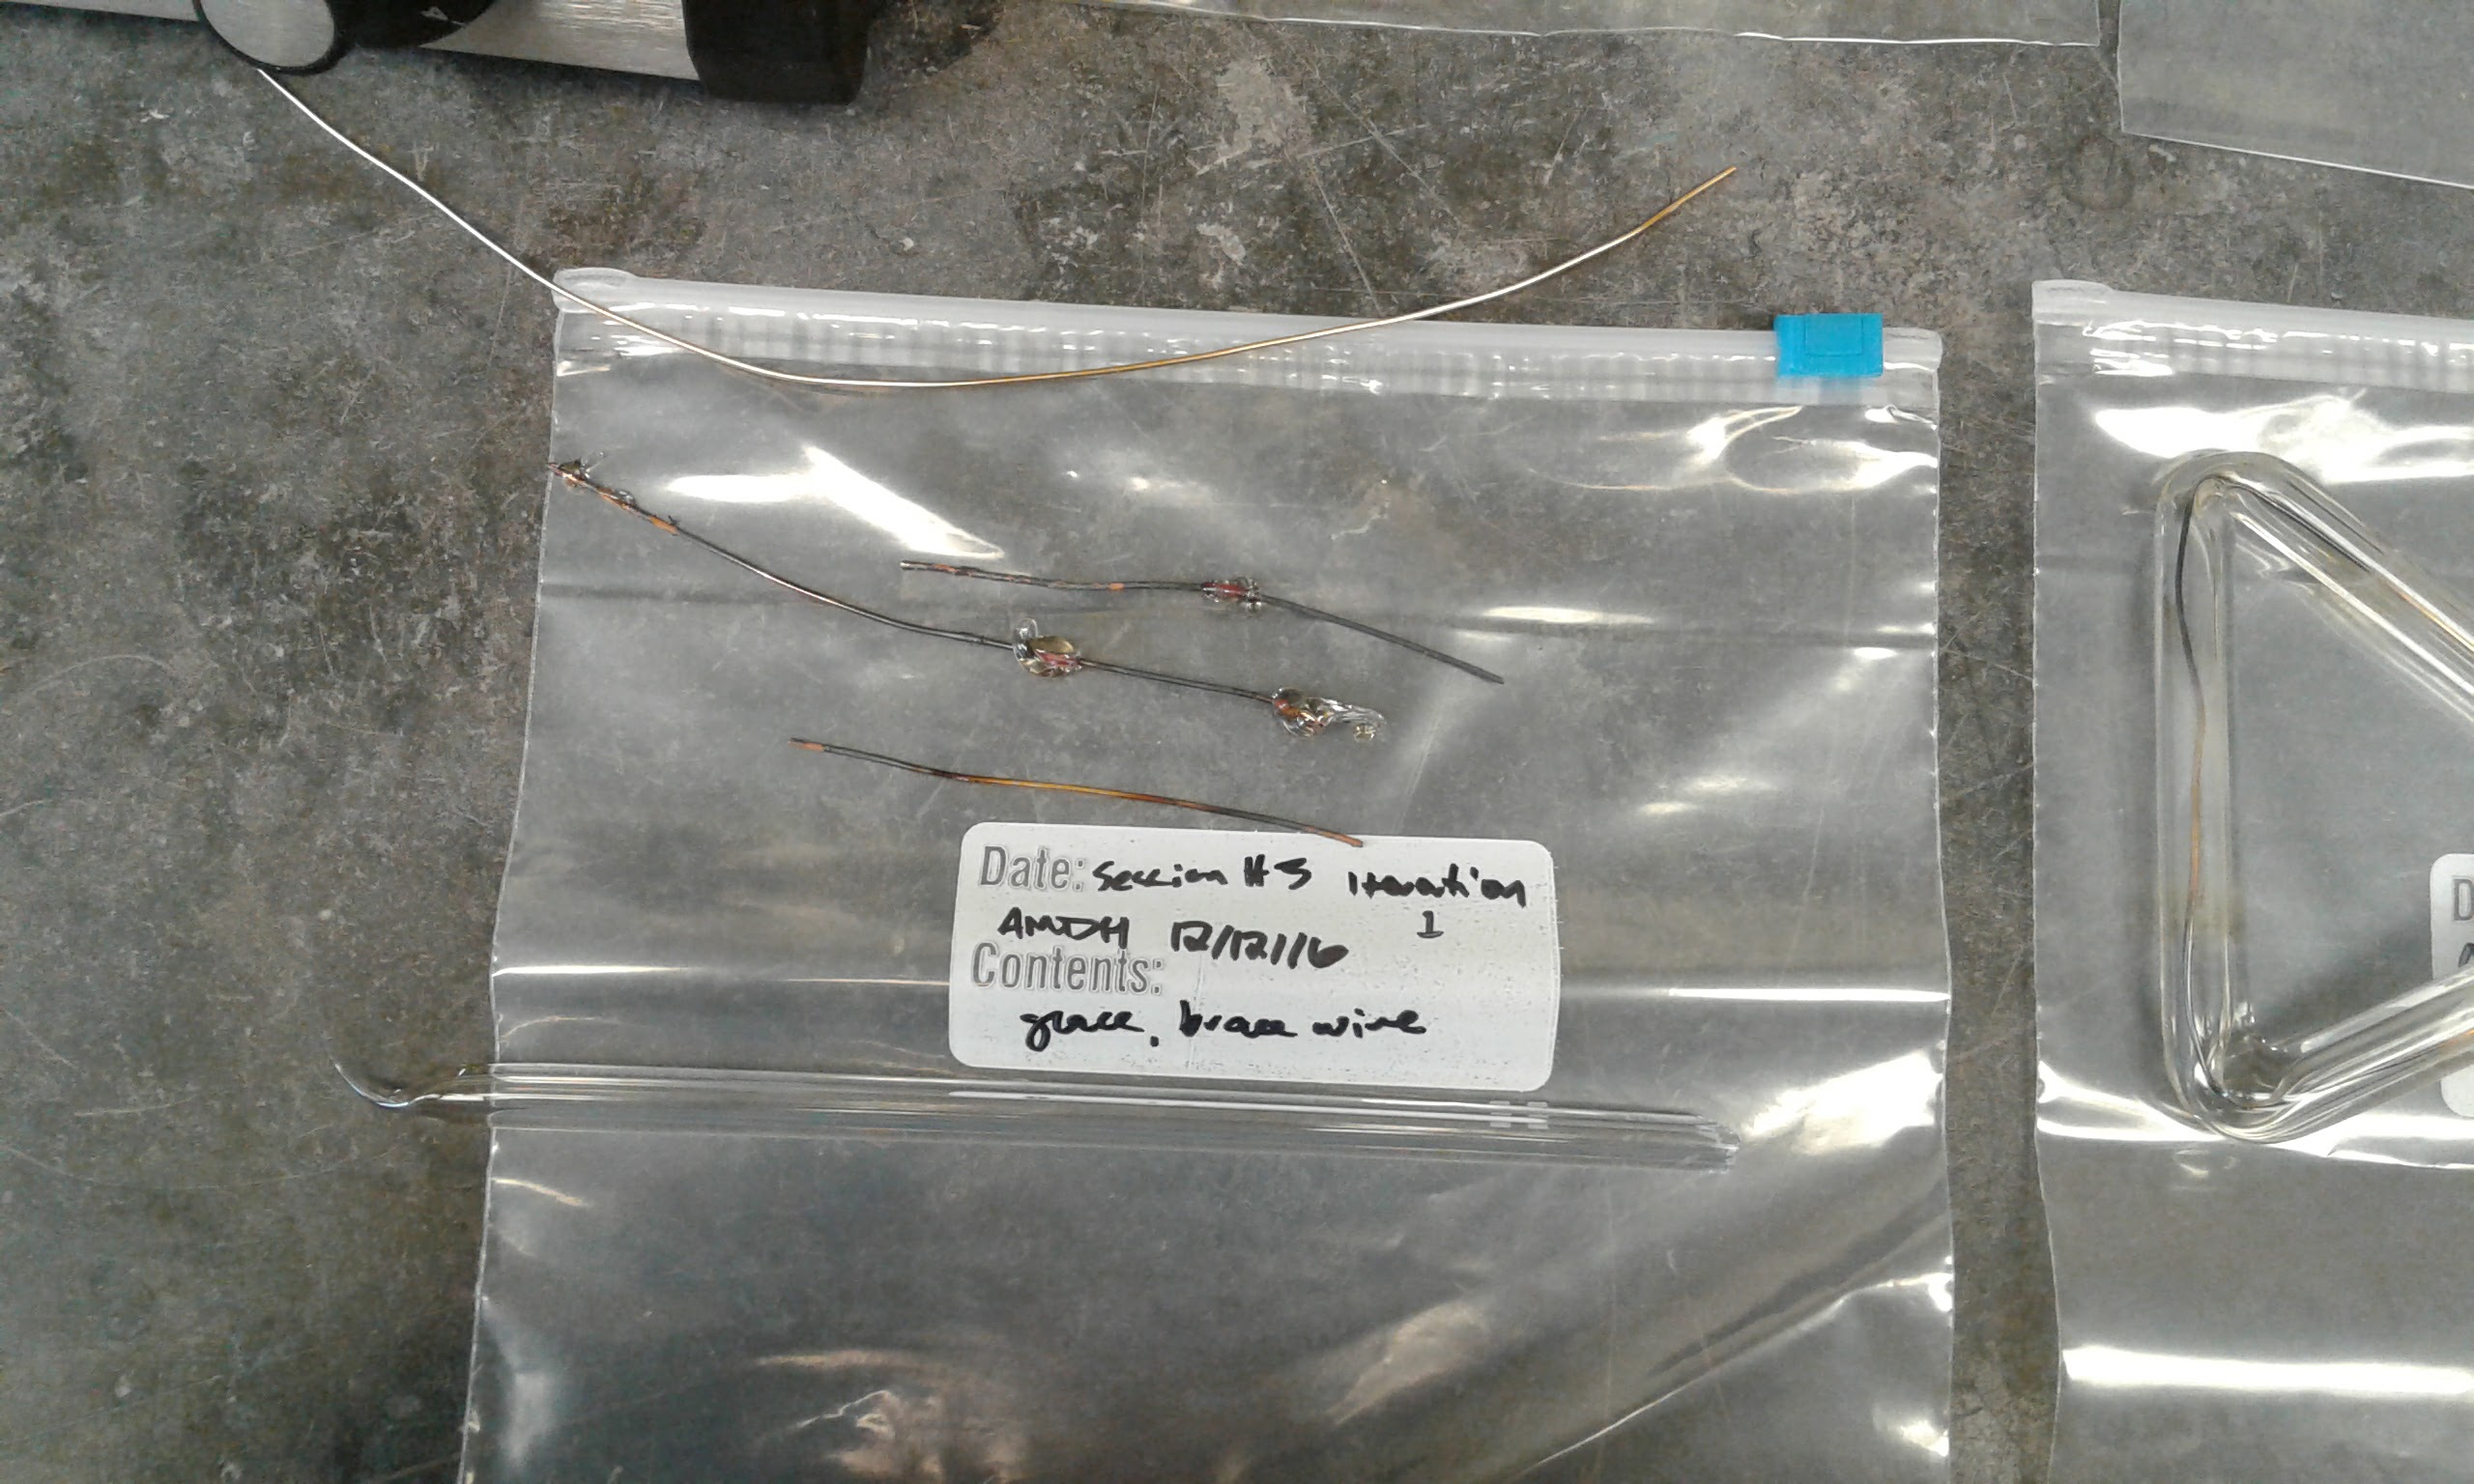
Lamp-winding trrial results.
Iteration #2 - Embedding
- I will insert the wire into the hollow cane. Preferably, wire will protrude from both ends of the glass tube.
- I will put the cane and the wire in the heat of the torch.
- I will manipulate the wire/cane and try to melt the cane onto the wire.
- I will manipulate the cane and try to bend the wire and glass at the same time.
- [AMDH] - Notes:
- It was extremely difficult to try and melt the glass all around the wire. The glass kept cracking and jumping off my wire. I had to be very ginger with the heat, tentatively putting the glass covered wire in the flame for short amounts of time. The wire heated much more quickly than the glass surrounding it. After much time I was able to fuse part of the end of the glass to the end of the wire, but the rest of it was not actually fused, just covering. Discouraged about being able to bend this at all, I decided to just heat one spot on the glass/wire and bend it. This worked very well, and inspired me to try Iteration #3
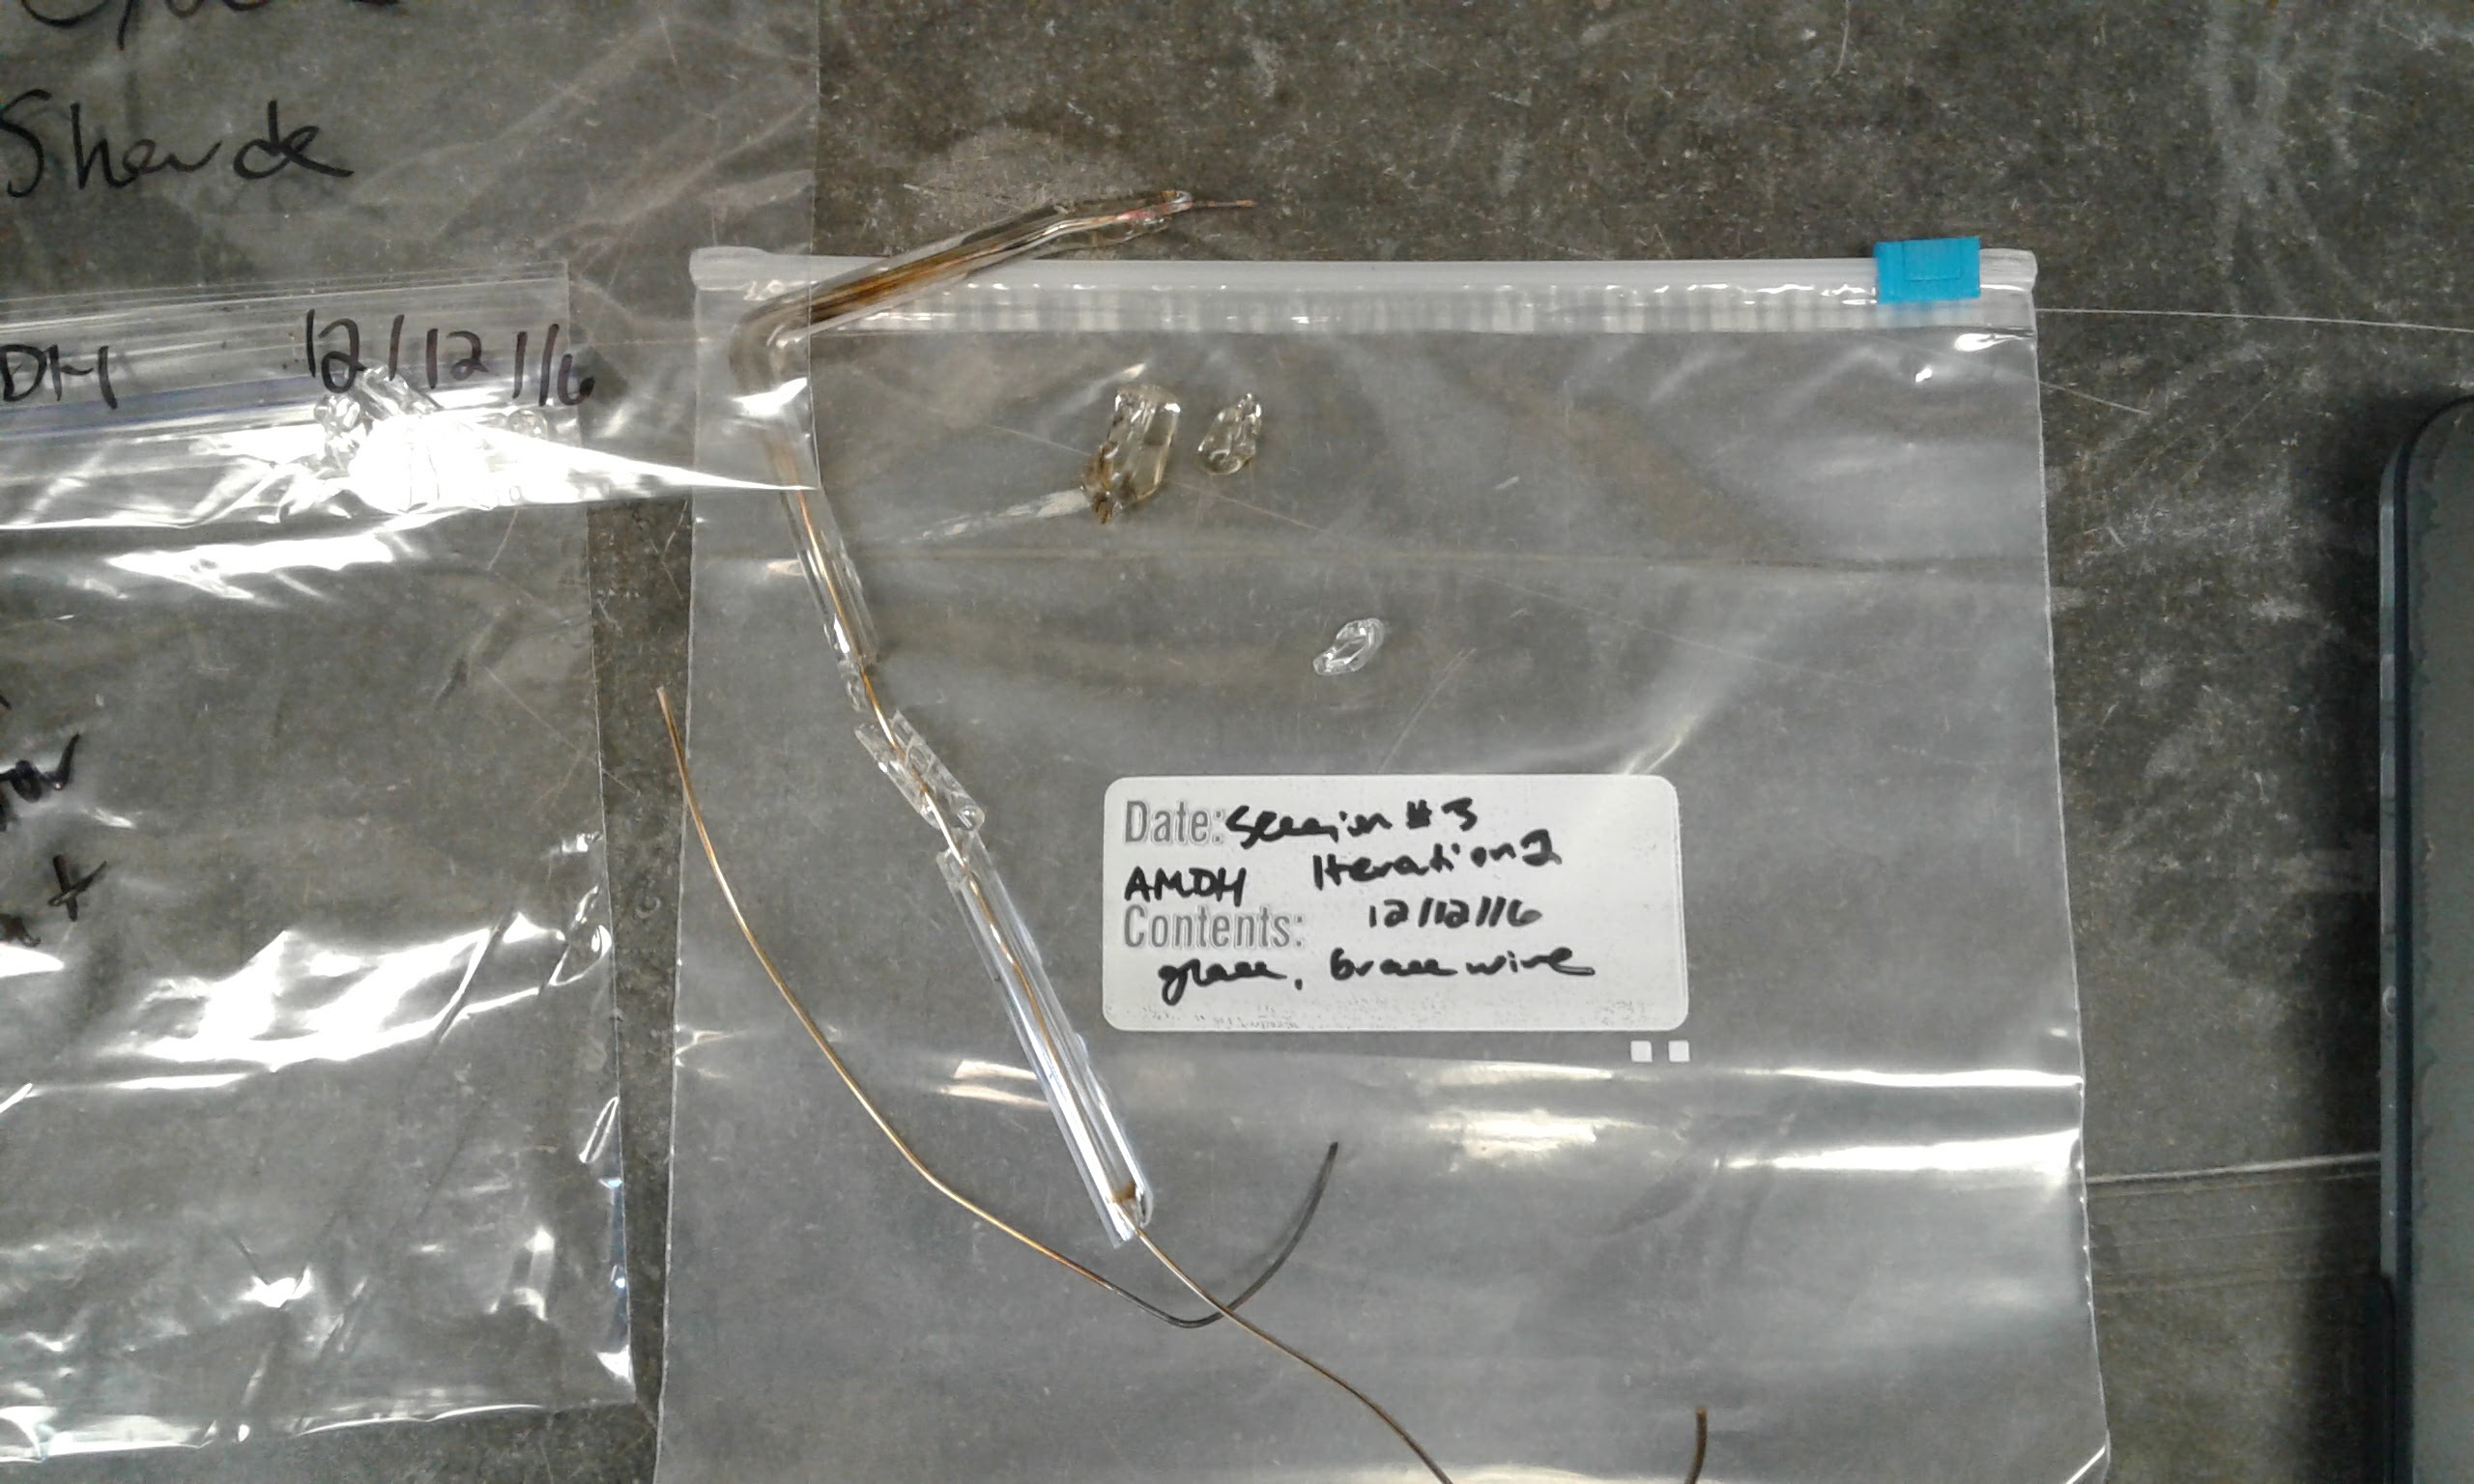
Embedding trial results.
Iteration #3 - Covering
- I inserted the wire into the hollow cane again, this time all the way through and sticking out either end.
- I put them in the heat of the torch at only one point, heating it slowly.
- [AMDH] - Notes:
- This was extremely easy. Heating only one point of the wire/glass so that I could bend it was easier than trying to actually fuse glass to the wire by getting both hot enough separately. I was able to bend this wire/glass combo three times, making a triangle. With more experiments it may be possible to make a whole cage. More trials and closer examination of the other recipes involving cages in Ms. will be necessary before I would be able to determine if it would be possible.
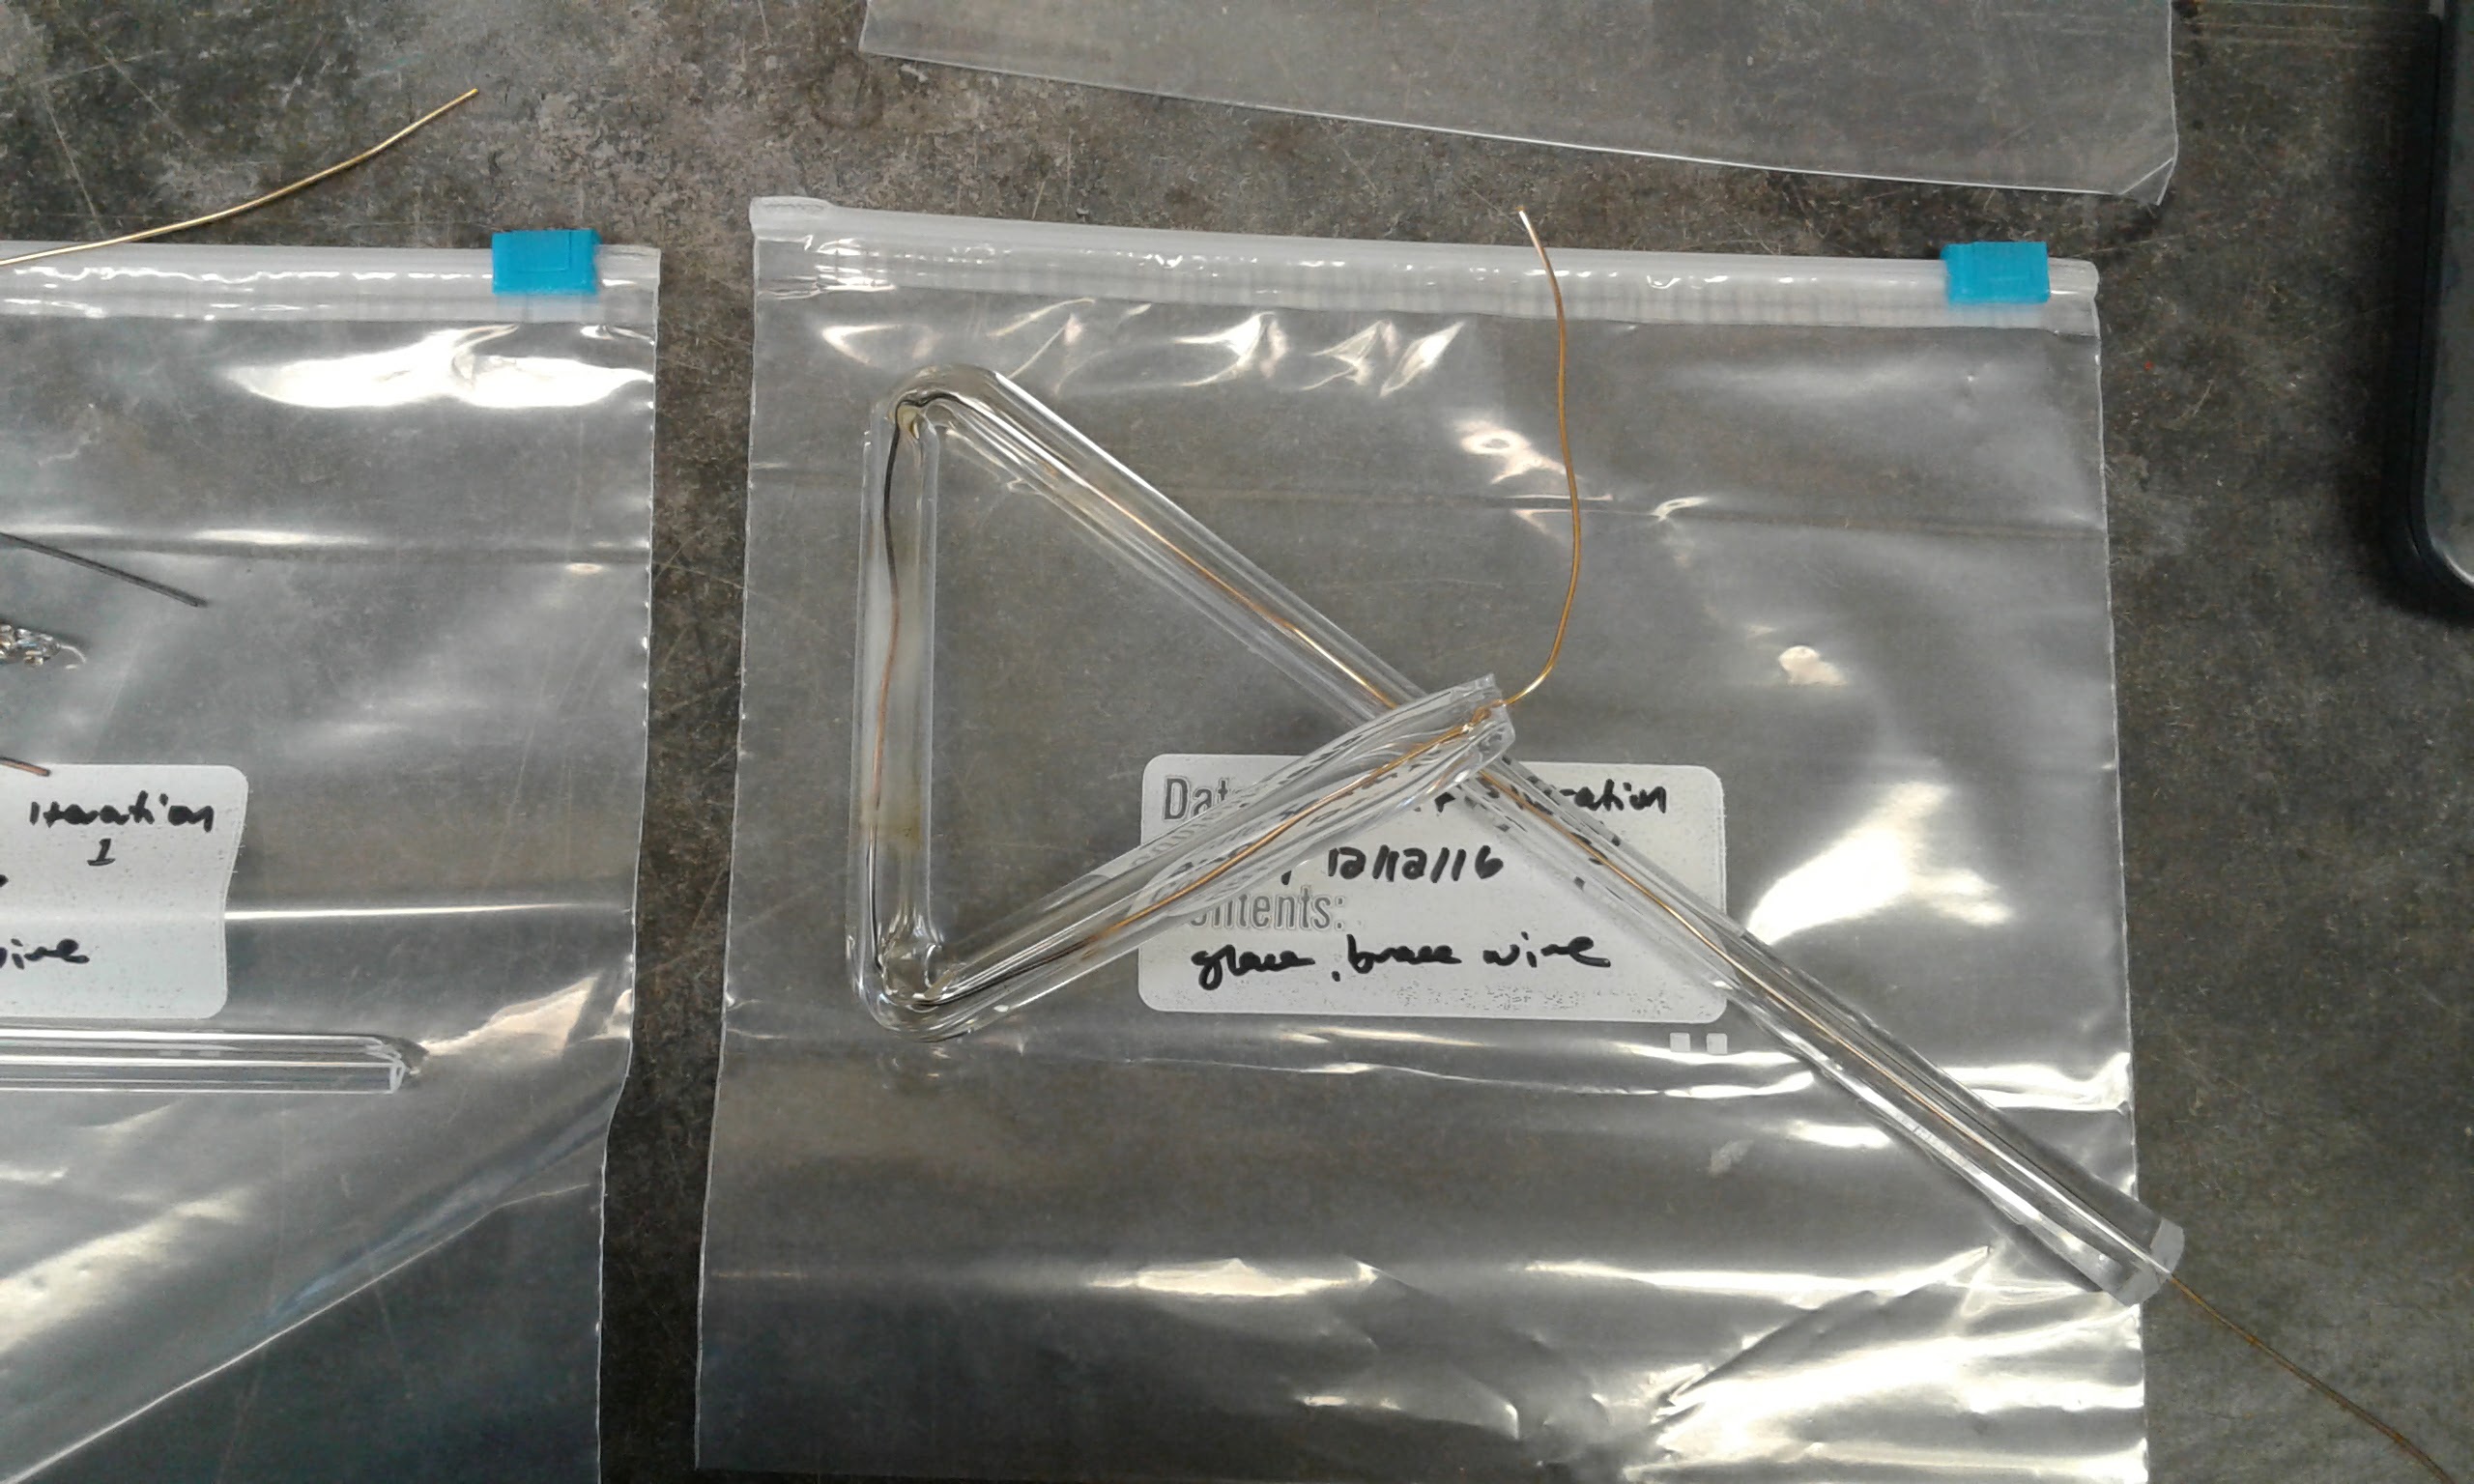
Covering trial.
Videos
For Videos please see my folder on the M&K flickr. They are too big to upload here but are very useful and contain many of my experiential field notes.
Extra Notes/Analysis
During my reconstruction, I reproduced a version of this furnace informed by the author-practitioner’s diagram, research into similar period ovens, and research internal to Ms. Fr. 640 and the author-practitioner’s knowledge of furnaces in general. Despite some differences in design (i.e. the use of a blowtorch instead ofcharcoal as a heat source) my furnace worked similarly to the one described in the recipe. I was able to lengthen a hollow cane by drawing it through a hole made through the body of the furnace while observing the glass’ color through the opening in the top to assess its temperature as it heated. My reconstruction indicates only one of many ways that the glass-button makers or the author-practitioner could have constructed this kind of furnace.
I found fusing glass directly onto wire particularly difficult, and ultimately the glass did not stick uniformly. From my experience of glassmaking, I knew that in order to adhere the glass to the metal both had to be quite hot. Heating both the glass and the wire in the small flame at the same time was difficult because the wire heated at a much faster rate than the glass. While both were hot, the glass stuck well to the wire. As both materials cooled at different rates, however, the glass started to come off the wire. Once the wire had a layer of glass, I directed the flame to one section of glass and wire and attempted to bend it, as the author-practitioner suggests. While the wire bent easily (since it was flexible even when cold), the glass had to be very hot to bend with the wire. After I let my trial cool to the touch, however, the bond between glass and wire became very unstable. Some of the glass stayed fused to the wire, but several pieces fell off.
The directed heat needed for lamp-winding made this technique even more difficult than attempting to build glass along the length of the wire. Again, to wind the glass around the wire I had to heat the wire and the glass at the same time. However, getting the glass and wire hot enough while simultaneously completing the precise hand motions necessary to wind the glass around the wire was very difficult. The wire kept getting too hot and melting off into pieces. In the end, I was left with several pieces of wire topped with glass lumps, and a few wires dotted with glass beads. The wire and glass combination seemed too delicate for me to attempt bending it.
The glass cracked several times during my reconstruction. To embed the wire in my glass, I inserted it into the hollow tube. Then, in an attempt to fuse the glass to the wire, I heated the hollow cane in a direct flame. When heated simultaneously in this way, however, the difference between the rate at which glass and wire heat prevented a smooth fusion of glass to wire. The wire heated much more quickly than the glass encasing it. While I did manage to partly fuse the glass to the wire at the very end of the tube, the glass cracked and fell off the wire in several places.
